
Step 01 – Integration
Before setting up your Order page, you first need to integrate PayPal and/or Stripe to your website.
For steps to do this, simply visit these articles
Integrating Stripe with your website
Integrating PayPal with your website
Step 02 – Setting up your Order Page
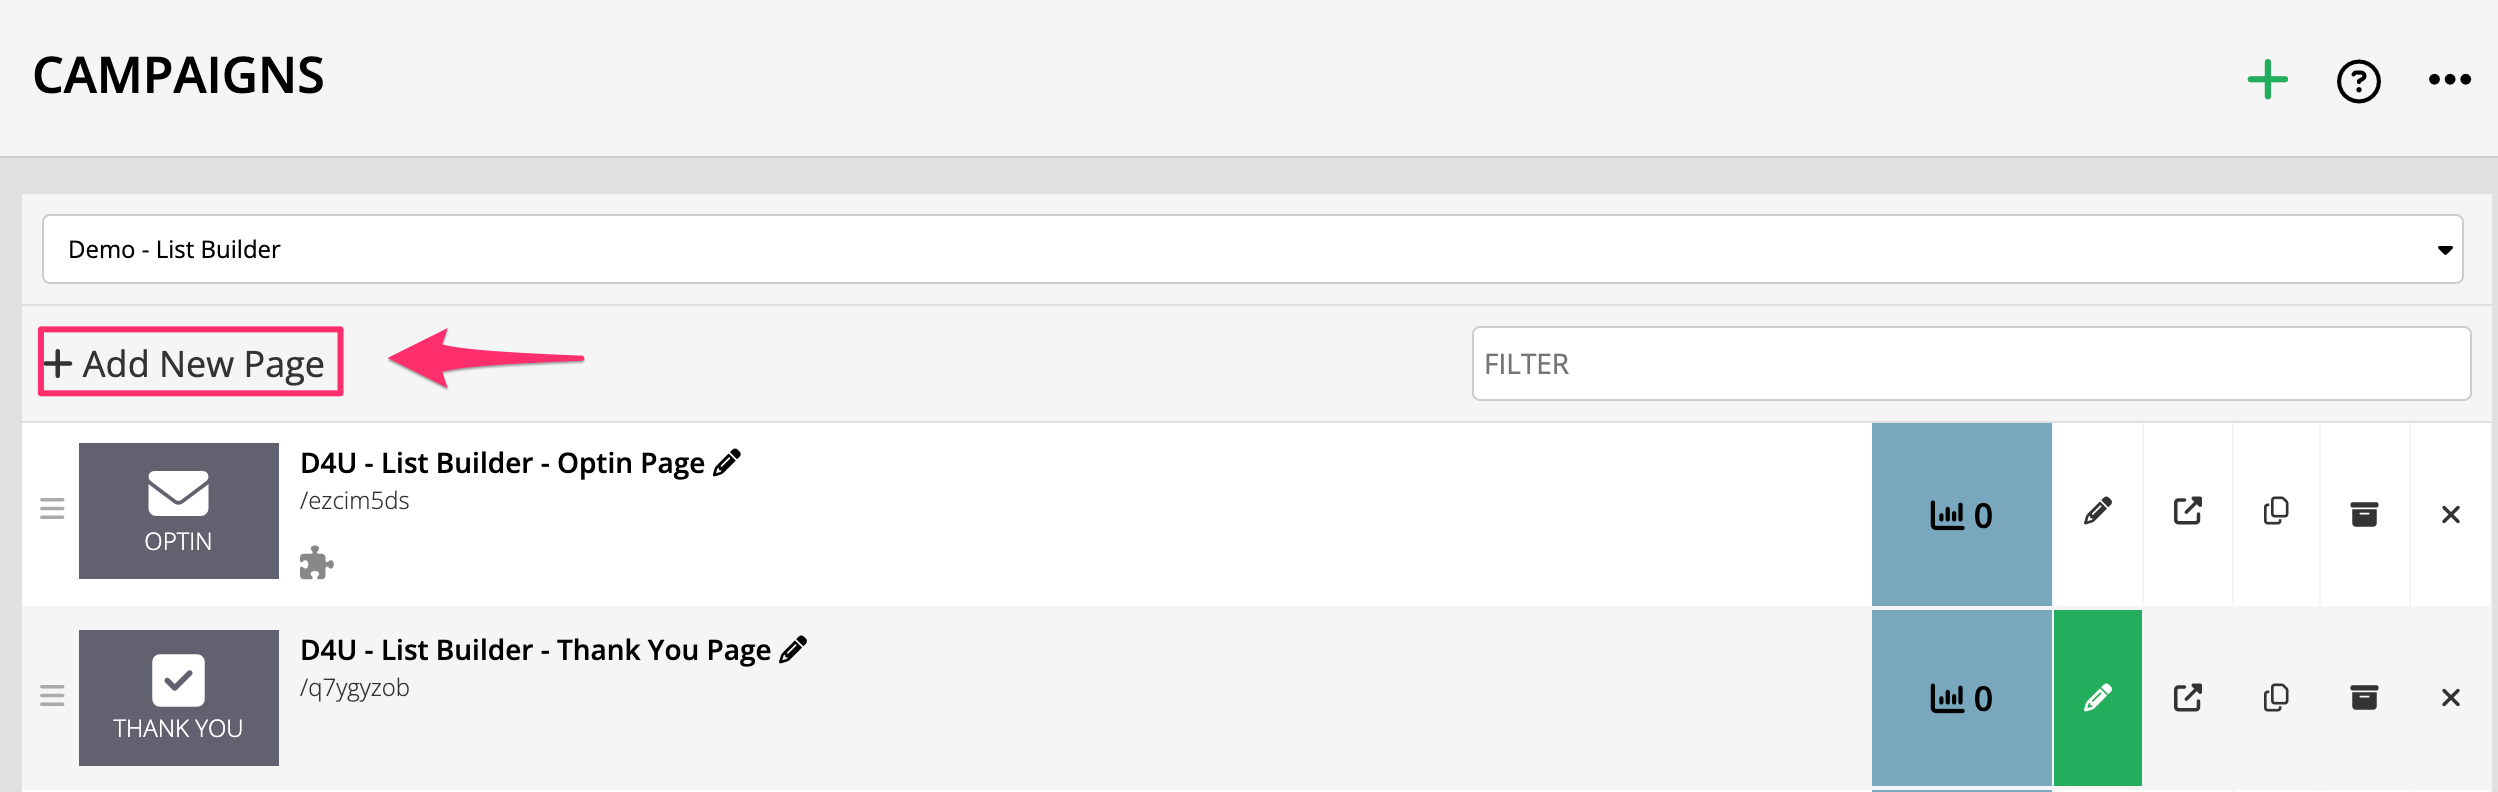
- Go to Campaigns in the left-sidebar menu.
Select the relevant campaign and the Order page. - If you need to add the Order page to your campaign, click on +Add New Page button.
- In the next screen, give the Order page a name and select Order Pages from the Select Page Template drop-down. Select your preferred order page template.

- This will open the Page builder for that specific template. Once opened, click on Payment Settings in the left sidebar menu.

Payment Systems
In this drop-down you will find 3 options: 
- Stripe
Select this option if you want your Order page to link to your Stripe account only.
Once selected, a Stripe payment option will appear in the Preview screen to the right. - PayPal
Select this option if you want your Order page to link to your PayPal account only.
Once selected, a PayPal payment option will appear in the Preview screen to the right. - Stripe & PayPal
Select this option if you want your Order page to link to both your PayPal and Stripe account. Once selected, a Stripe & PayPal payment option will appear in the Preview screen to the right.
TIP! Completing step one above ensures that the integration is seamless with your Order and Upsell pages.
Give Access To
You will find 4 options in the drop-down:

- Online Course
Select this option if you want to link this page to your course
Select Course, choose the relevant course - Forum
Select this option if you want to link this page to your forum - Bundle
Select this option if you want to link this page to your bundle
Under Select Bundle, choose the relevant bundle - External Product
Select this option if you want to sell access to something else
Under Select External Product, choose the relevant bundle
Currency
Select the specific currency you would like to display in your Order / Upsell page. 
Currently, we have the following currencies available in KLEQ: USD, AUD, BRL, CAD, CHF, DKK, EUR, HKD, NZD, and GBP.
Payment Type
Select the specific payment option you would like to offer users in order to access your course. 
- Single Payment
Users will make one payment to access course
Simply enter the price for single payments in the Single Price field - Single Payment & Payment Plan
This payment type (only available on Order pages) will provide users with the option to either make a single payment or pay via the payment plan. - Under Single Price, enter the price for single payments
- Under Payment Period, select either Weekly, Monthly, 3 Months, 6 Months or Yearly
- Under Payment Price, specify the Weekly, Monthly, 3 Months, 6 Months or Yearly price users will pay
- Under Number of Payments, select the number of payments included in the payment plan.
- Payment Plan
Users will make a fixed number of smaller payments to access course - Under Payment Period, select either Every week, Every 2 weeks, Every Month, Every 3 Months, Every 6 Months or Every year.
- Under Payment Price, specify the Every week, Every 2 weeks, Every Month, Every 3 Months, Every 6 Months or Every year price users will pay.
- Under Number of Payments, select the number of payments included in the payment plan.
- Subscription
Users will pay weekly, every 2 weeks, monthly, every 3 months, every 6 months or yearly subscription to access the course. - Under Subscription Period, select either Every week, Every 2 weeks, Every Month, Every 3 Months, Every 6 Months or Every year.
- Under Subscription Price, enter the price for the subscription
- Under Trial Period days, select the number of days you want to offer as a Trial period for the course
- Under Trial Period Price, select zero “0” to offer a Free Trial or a discounted rate for the trial period e.g. $10 for first months access.
IMPORTANT:
+ Single payment and Payment Plan of $0 are NOT allowed by Stripe/PayPal.
+ Payment Plan of $0 are NOT allowed by Stripe/PayPal.
+ Subscriptions of $0 per month are NOT allowed by Stripe/PayPal.
+ Subscriptions of $X per month with a Trial of $0 are OK and will work with Stripe/PayPal.
Thank You Page
Select the Thank You page you would like users redirected to, once the payment is complete. 
TIP: If you selected the Stripe & PayPal option under Payment Systems, you will be given two separate Thank You fields – one for Stripe & one for PayPal. This is very important when you have 1-click Upsells or Downsells as part of your funnels. Now you can decide exactly where they go based on their payment method! These fields enable you to select PayPal-specific and Stripe-specific Upsell pages to redirect customers to after they submit their main Order.
Purchase Action
This action will be applied each time a purchase has been made. Simply enable the toggle ON and Purchase Action drop-down button will appear. Some of the options in the Action drop-down will depend on the systems you have integrated on your KLEQ website. For example, if Drip is not integrated with your KLEQ site, the Apply Drip Tag option will not appear in the Action drop-down list.
Apply a Tag
When there is a purchase, you can apply the integrated emailing system’s tag to the user’s profile. Simply select the relevant tag from the drop-down menu.
TIP: If you selected Flodesk or AWeber email systems on the Purchase Action drop-down menu, an option to select “Custom Field for Phone:” will be visible in the Payment Settings.
The phone number will be stored in Flodesk and AWeber if you select a Flodesk segment or AWeber tag in the Custom Field for Phone.
Rebill Action
This will trigger the action every time the subscription renews and the client is charged. If you chose Payment plan or Subscription, the rebill option will be available. By default, it is turned off. Simply enable the toggle ON, and the Rebill Action drop-down button will appear. Some of the options in the Action drop-down menu are dependent on the systems you have integrated into your KLEQ website. For example, if Drip is not integrated into your KLEQ site, the Apply Drip Tag option will not appear in the Action drop-down list.
Apply a Tag
When there is a rebill, you can apply the integrated emailing system’s tag to the user’s profile. Simply select the relevant tag from the drop-down menu.

To create a new tag for this purpose, you may select Create new tag… at the bottom of the tags list.
For Active Campaign, the tag must first be setup in your Active Campaign account. Once done, it will immediately appear in the Active Campaign drop-down.
If the newly created tag did not appear in the list, just select Refresh tags list… and the list will reload, and your newly created tag should appear after.
Once done, click on the SAVE button at the very bottom.
Send to webhook
This setting is ideal if you want to send notifications to your system via a webhook URL.


- Purchase Notification and Rebill Notification
This option allows us to send a notification each time a purchase and rebill (if enabled) has been made.
To do this, simply add your preferred webhook URL and we will send the user data to that URL.
We highly recommend using Zapier.com for these webhooks, as they integrate with 100’s systems and apps and they are simple to set up. You can find more information on how to set up Zapier with KLEQ here: Integrate KLEQ with Zapier WebhooksHow this Works:
Purchase Notification – When users submit their details for their payment in the Order Page (Data includes the billing and shipping details if the shipping/billing options were enabled or hide was unchecked in the billing block. See how to set up billing block), the payment for the Product goes through PayPal or Stripe. At the same time, we will send information to your system through the webhook URL.
Rebill Notification – This will trigger the action every time the subscription renews and the client is charged.
Step 03 – Customize Your Order Page
Back in the Order / Upsell Page settings, you can edit any aspect of the page by clicking on the element in the Preview Pane. The settings for that particular element will then appear in the left sidebar menu.
- Order and Upsell pages now support our state of the art page builder, allowing you to add custom elements called Blocks. Giving you full control of how your Order pages will look and function. For more info on how Blocks work, we recommend this article Working with Blocks: Campaign Pages
- They also support our new Billing-specific Blocks, allowing you to control what Billing elements are included in your Order/Upsell pages and where they are positioned on the page.
Billing Block
Payment Block
Order Block
Accept Terms Block
Order Bump Block
‘Submit Order’ Button Block
- Once a Billing Block element has been included on your page, it will be grayed out in the left options panel. This means you cannot have multiple instances of the same Billing element on one Order/Upsell page.

Once done, your Order page will be ready!
NB! The amount displayed on a checkout page will automatically includes a comma on the amount more than three digits.
Related Articles
Advanced Settings for Order pages
How to setup your Promo Codes
Setting up a Stripe Upsell Page
Setting up a PayPal Upsell Page