
For Stripe and PayPal users, your invoices will now automatically be sent to your customers directly from your KLEQ site. Invoice details can easily be updated and on request, can even be resent to your customers from the Admin dashboard.
Access the Invoice of a Transaction
- Go to Sales then select Transactions.

- In the Transactions dashboard, locate the relevant transaction you want.
Click the Invoice button in the right part of the transaction.
The Invoice popup window will appear.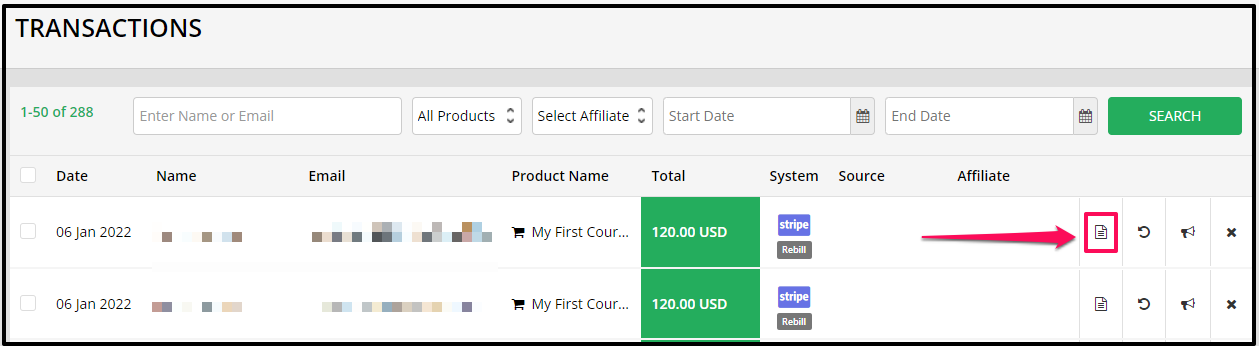
- The Invoice popup will show you the details of the purchase.
You can click the RE-SEND button if your members requested a copy of their invoice.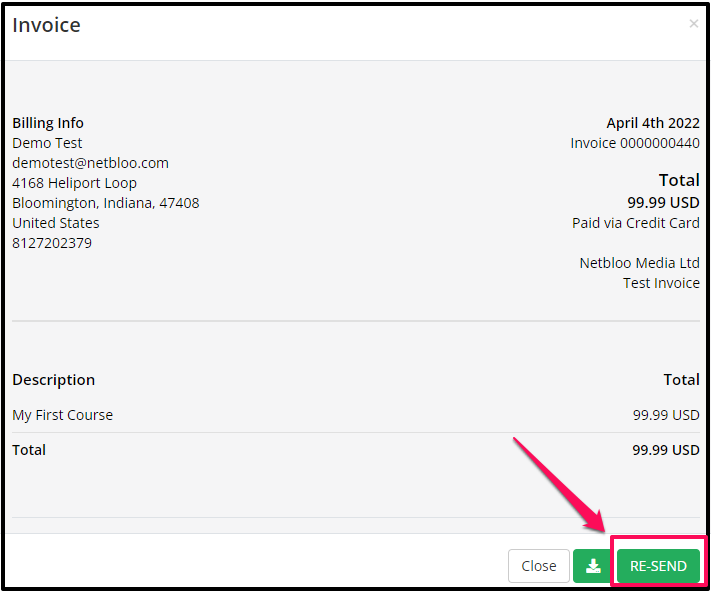
- You may also click on the Download button which will allow you to download the invoice in PDF format.

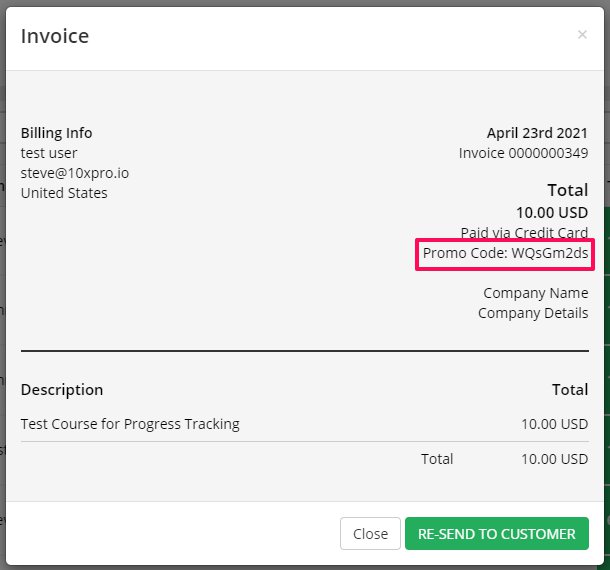
Find Promo Code used on Sales Invoice
The Sales invoice will display the promo code that was used when purchasing on the order page. It will display as Promo Code: XXXXX, XXXXX is promo code used.
You can check this on Sales in the Admin area.
The promo code will also show up on the invoice email sent to customers
To Add Details to your Invoice
You can add details to your invoice such as your company name, company address, etc., that will display in the lower right part of your invoice.

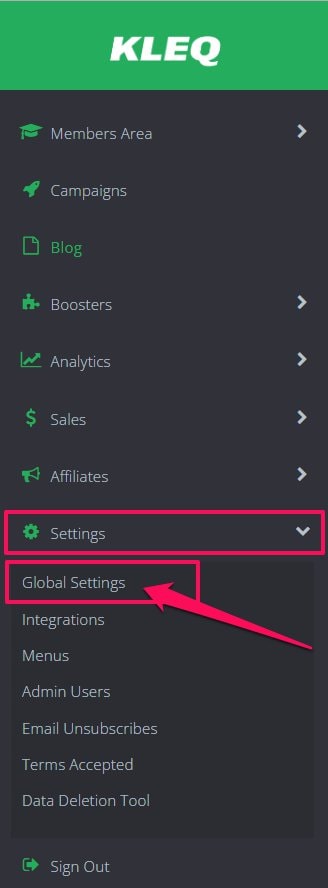
- Go to Settings then select Global Settings.
- In the Global Settings page, click Card & Invoices.

- Add the company details you want to display in your Invoice.

- Click SAVE CHANGES once you’re done.
Enable Email Invoice on Purchase
This option will allow you to enable/disable sending the invoice to your customer’s email address upon purchase complete.
NB! By default, Email Invoice on Purchase is ON.
- Go to Settings then select Global Settings.
- In the Global Settings page, click Card & Invoices.
On the Email Invoice on Purchase, turn the Toggle ON/OFF to enable/disable it.
Click on SAVE CHANGES once you’re done.
NB: The system does not support sending an invoice for $0 purchase or if the customer has not been charged.
Customers can still access the invoice by logging in to the Member’s area > Billing section.
Expiring Cards Action
This option will allow you to enable or disable the Expiring Cards Action. When enabled, you have the option to add action, which is to select the email system to apply a tag, segment, or group, and webhook. When the customer card is expiring, the tag, segment, or group will be added to their profile depending on the email system selected. You can use this to perform different automations in your email system. Another option is Send Webhook, in which data is sent through the Webhook URL.
Note: This option is only applicable to Stripe users.
Card Update Action
This option will allow you to enable or disable the Card Update Action. When enabled, you have the option to add action, which is to select the email system to apply a tag, a segment, or group, and a webhook. When the customer updates the card details in their Profile > Billing > Subscriptions, the tag, segment, or group will be added to their profile depending on the email system selected. You can use this to perform different automations in your email system. Another option is Send Webhook, in which data is sent through the Webhook URL.
Note: This option is only applicable to Stripe users.

Member Cancels Subscription Action
This option will allow you to enable or disable the Member Cancels Subscription Action. When enabled, you have the option to add action, which is to select the email system to apply a tag, a segment, or group, and a webhook. When a member cancels the subscription, a tag, segment, or group will be added to their profile, depending on the email system selected. You can use this to perform different automations in your email system. Another option is Send Webhook, in which data is sent through the Webhook URL.

Subscription Payment Max Fails
This option will allow you to enable or disable the Subscription Payment Max Fails. When enabled, you have the option to add action, which is to select the email system to apply a tag, a segment, or group, and a webhook. When a member’s subscription reaches the maximum number of failed payments, a tag, segment, or group will be added to their profile, depending on the email system selected. You can use this to perform different automations in your email system. Another option is Send Webhook, in which data is sent through the Webhook URL.
