
This article will explain and give you the details needed in order to integrate 2 sites using Zapier and send notifications from PayPal to these sites on successful purchases.
To help with the process, here’s a video that will explain how to set everything up:
The steps needed to integrate 2 websites with PayPal are described below:
-
- Log in to Zapier.com
- Click on the Make a Zap! button located in the top right of the page.
- Once you have clicked on Make a Zap!, the following page will open:
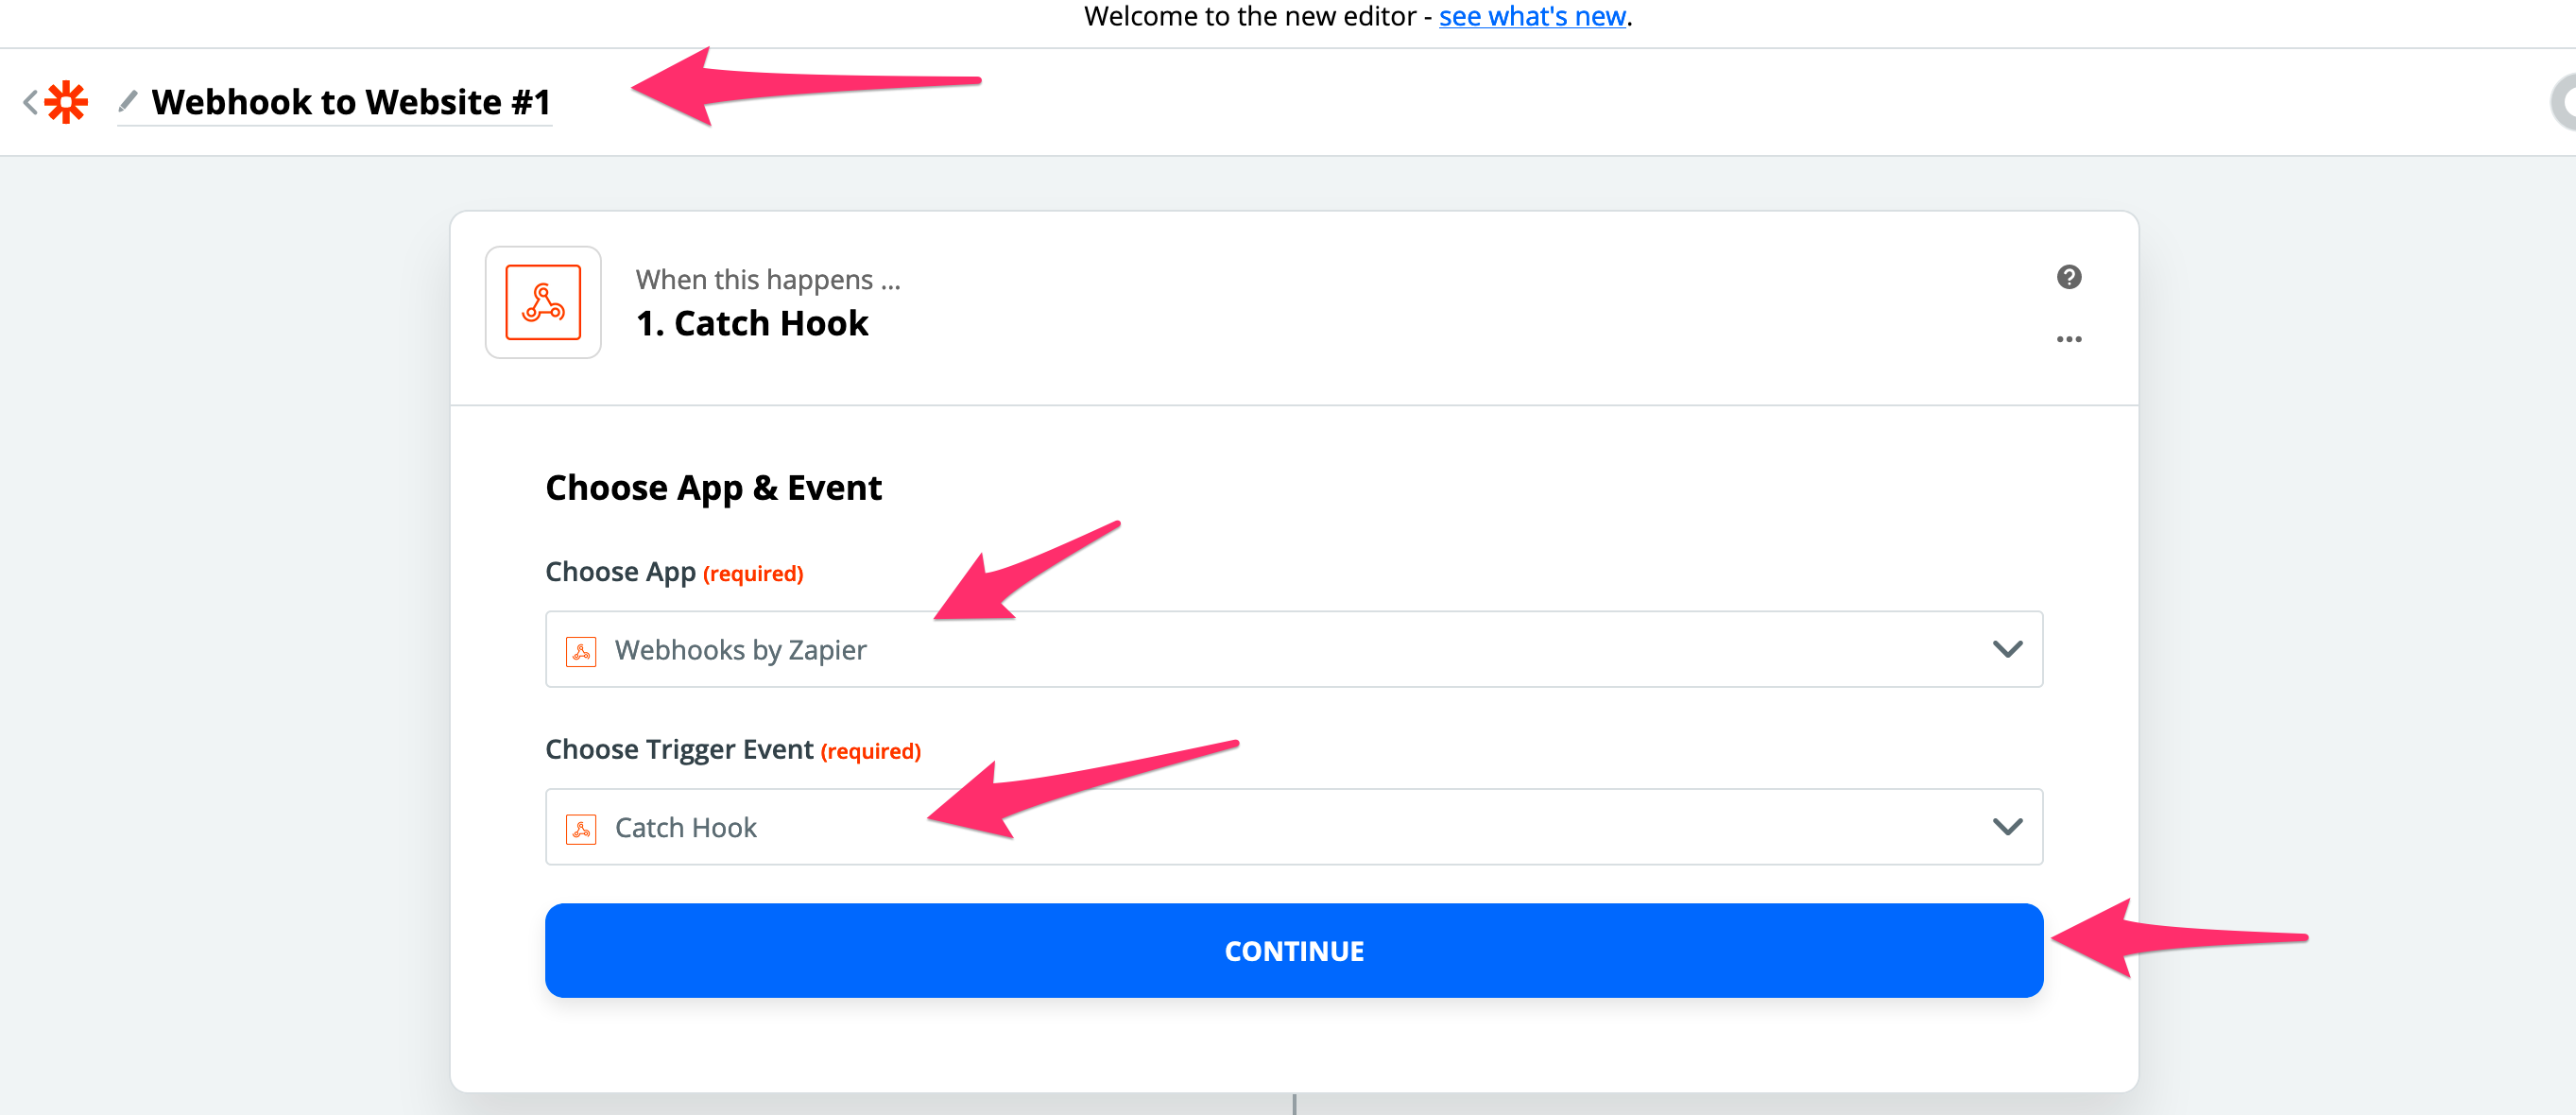
 You will have to give your Zap a name and choose a trigger for your zap by using the Search box.
 - For our purpose, we will name our zap “Webhook to Website #1” and we will select the App to be Webhooks by Zapier and the Trigger Event to be a Catch Hook, and click on Continue.
- On the next part, you will need to Copy your webhook and store it in a text document for later use. You can do this by clicking on the Copy button next to your Custom Webhook URL and click on Continue.

- You’re done with the first part of your Zap, which controls the Trigger or When this happens. Now to set up what happens once an action is triggered.You will have to select again the Webhooks by Zapier in the App, only this time, the Action Event will be a POST action, and click on Continue.

- Next you will need to customize your POST action. In our case, we need a URL that will receive messages. For this, you need to go to your website Admin Area, and under Settings > Integration, you will find the PayPal section. You need to copy that PayPal IPN URL and paste it in the URL section under Customize Post on Zapier:
 Also, you need to leave the Payload Type as a Form while everything else can stay as it is. Scroll down and click on Continue.
 - Congratulations! Your zap is ready! Last thing you need to do is to turn it on by clicking on TURN ZAP ON.

- Now we need to move on with the creation of the second zap, meant for your second website. To do this, you can to back to your Zaps on Zapier, find the Zap you have just created and using the arrow in the corner, open the drop-down and click on Copy. This will duplicate the Zap you have just created and for your second website, you will only need to do some minor changes.

- After you have duplicated your initial Zap, open the newly created one, rename it to “Webhook to Website #2, and once again, under Customize Hook, copy the Custom Webhook URL:
 Store this webhook URL as before, in a text file.
- Under second section of your 2nd Zap, that refers to the POST, you will need to add the IPN from your second site. For this, you need to go to your second website Admin Area, and under Settings > Integration, you will find the PayPal section. You need to copy that PayPal IPN URL and paste it in the URL section under Customize Poston Zapier:

- Click on Continue, and you are done! You now have another Zap that you will use to notify your KLEQ site of events from your PayPal account. Last thing you need to do is to turn the second Zap on by clicking the toggle on the top right site from OFF to ON.
Regarding the Custom Webhook URLs that we have asked you to store in a text file, you will use these and add them to PayPal.
As an example, your webhooks from Zapier should look like this:
#1 https://hooks.zapier.com/hooks/catch/4309146/o4ch52j/
#2 https://hooks.zapier.com/hooks/catch/4309146/o4ch0wi/
In order for these to be usable by PayPal in the IPN section, you will need to edit the URL to look as such:
https://hooks.zapier.com/hooks/catch/4309146/o4ch52j, o4ch0wi/
To add this URL to your PayPal account, please follow the steps described on this dedicated article: How to integrate KLEQ with Paypal