
The One Question Survey helps you to get feedback from your Audience, so that you know exactly what they want and also helps you to build your Email list.
To Get Started:
- Go to Campaigns and then select the relevant Campaign you want to add the survey to.
Once opened, click on + Add New Page .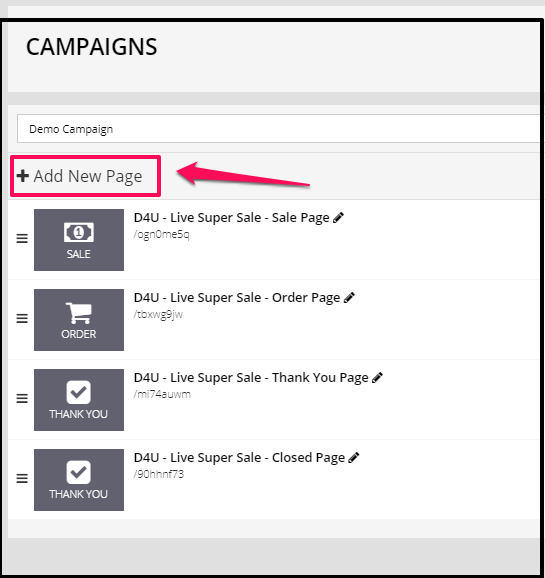
- Give the page a name.
Under Select Page Template, select Special Pages.
Then select the One Question Survey template.
Once selected, the page editor for the One Question Survey template will open.
- In the right Preview Pane, if you hover your mouse over the different elements, you will see that they get highlighted. Whatever highlighted element you click on, that item’s settings will appear in the left-sidebar menu.
One Question Survey Settings
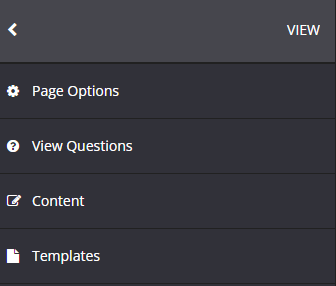
View Questions
- To view users questions, go to View Questions in the left-sidebar menu
- In the next screen, you will see a table that shows you all the questions you received from users. The details provided:
+ when the question was submitted
+ the name of the user
+ the email of the user
+ user question - To Export the questions, simply click on Export button at the top of the page
- To Delete the questions, simply click on the Delete All button at the top of the page.
Content 
Question title
- Click on the Title of the survey ask your users a question to get specific feedback about the topics they would like covered in your courses e.g. What are your top 2 questions about {Topic}?.
- Once done, click SAVE to apply changes.
Description
- Click on the text just below the survey title and provide more information about the questions you would like to receive from your users.
- Once done, click SAVE to apply changes.
Name Input
- This will allow you to hide/unhide the name input field in your form.
- Once done, click SAVE to apply changes.
Email Option & Form Code
- This will allow you to hide/unhide the email input field in your form.
- In order to capture your users emails, you will need to add the your Email System WebForm Code: from your Emailing System to your to the field.
- Once done, click SAVE.
- Now, when someone submits a question on this survey page, their question and details will be stored on your site. Additionally, their name and email will be sent to your email marketing system, allowing you to build your email list.
Text Input
- This allows you to edit the prompt text where users can input the their question or answers.
- Once done, click SAVE to apply changes.
Accept Terms
- By default, the Accept Terms on One Question Survey is disabled.
- To enable Accept Terms on your page, go to Accept Terms in the left-sidebar menu.
- Uncheck Hide item. The Terms Accept checkbox will appear on your page.
- In the Text field, you can customize your Terms Accept text.
- Once done, click SAVE to apply changes.
Submit Button
- Enable Use Google reCaptcha to protect your page from spam and abuse.
Once enabled, users cannot complete the survey form without solving the captcha. - Edit your button text label by changing the text in the Value field.
- Once done, click SAVE to apply changes.
Menu
- Select a footer menu for your page.
To create a Menu, proceed here.
That’s it! Your One Question Survey is setup.