
The Menus setting allows you to add different menu options (e.g. Footer Menu, Main Menu) to any campaign page on your site.
Setting up a Menu
- Go to Settings in the left sidebar menu and then select Menus.

- In the Menus dashboard, click the Plus (+) icon on the upper right hand corner.

- The Setup Menu pop up window will appear.
In the Menu Title field, add a title to your menu.
Then, click the + Add New Item.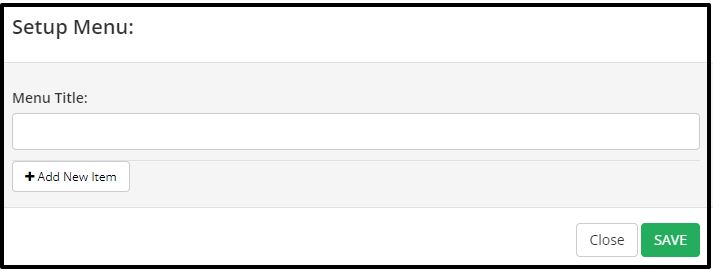
- In the Title field, add a label to your menu item.

- In the Destination drop-down menu, choose the page you want to link to your menu item.
- Choose the option to open the page in a new tab or not by clicking Open in New Tab and selecting Yes or No.
- If you don’t want your link to be followed, you may leave the No Follow option to No.
- Click the + Add New Item button to add more item.
- Upon completion, the new menu item will appear.
NOTE: The sequence of the links in your menu will depend on how the items are placed in your Setup Menu pop up window.

Change the sequence of your items
You may change the sequence of your items by drag and dropping them.
- To turn on & off the menu item, simply click the toggle button.
- To edit the Menu settings, simply click the pencil icon.
- To delete the menu item, simply click the (x) button.
That’s it! Click on the SAVE CHANGES and you are done.
Changing the Navigation Level of your Menus
You may change the level of navigation for your menus.
Just drag and drop the item to the bottom of the item you want it to be a sub-level.
You may setup up to 3rd level of navigations for your menus.

Editing your Menu
- Click the Pencil button to open the Setup Menu to make changes to your menu.
The Setup Menu popup window will appear for you to make changes to your menu.
- Click the (x) button to delete a menu.

Related Articles
How to setup a Menu Block
How to Add Sub-menu on your Menus