
- Sign in on your Facebook Business account.
If you don’t have one yet, you can create one here. - Click on Create Account.
![]()
- Add your business name.
![]()
- Click on Continue.
![]()
- Add your name and business email address, and click on Finish.
![]()
- Click on Business Manager.
![]()
- Go to Measure & Report and then Events Manager. Select Pixels.
![]()
- At the bottom of the page, click Create a Pixel.
![]()
- Add a name for your Pixel and click Create.
![]()
- Select Manually install the code yourself.
![]()
- Scroll down to the section “Copy the entire pixel code and paste it into the website header“. Click on the code to copy it to your clipboard.
![]()
- Access your KLEQ site. Go to Settings and the go to Global Settings.
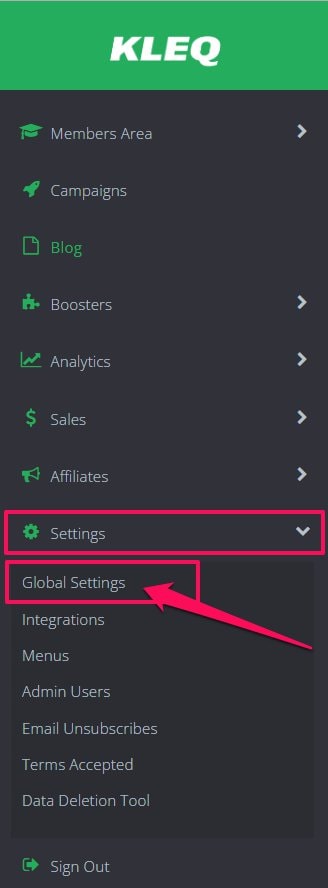
- Go to Global Custom Codes.

- Paste your Facebook Pixel Code in the Global Header Code field.
Click SAVE CHANGES.

- Go back to your Facebook Business page. Go to Send Test Traffic to your pixel.
Type any URL from your site in the empty field, preferably your Optin Page URL, and click Send Test Traffic.
![]()
- Your URL will popup in another browser tab. Simply go back to your Facebook Manager. The status should change to Active.
Click Continue.
![]()
- In the next screen, select Generate Lead.
![]()
- Click the code to copy it to your clipboard.
![]()
Go back to your site. Next, you will add that piece of code on any page that you redirect to after someone opts in. So if you have several Optin pages, and you are sending people to different Thank You pages, you need to put that code to every single Thank You page.
To do this open your Thank You page. Go to Page Options on the left sidebar menu. 
Click on the Custom Codes toggle.
Under After Body Tag, paste in your custom after body tag codes and scripts.
Once done, click on the SAVE button.
Verify Events using Pixel Helper (for Google Chrome only)
- Go back to Facebook Business page. Let’s verify events using the Pixel Helper.
Click Install Pixel Helper.

- You will be redirected to Facebook Pixel Helper page. Click Download Now.
![]()
- You will be redirected to Chrome Store.
Click ADD TO CHROME.

- Click Add Extension in the popup screen.
![]()
<
- Once added, you will see a notification on the upper right corner of your Chrome, and you will see that the Facebook Pixel Helper icon has been added to your extensions.

- Go back to your site, and reload your Thank You page.
After the reload, click on the Facebook Pixel Helper icon on the upper right corner.
You will see all of the events on your page, especially the Lead. This means that your Lead tracking code is installed correctly.

- Go back to Facebook Business page, and click Done.
![]()
Refresh your Facebook Business page, and you will see all of the Events as well as the analytics.
![]()
Related Articles
Adding Custom Header code
Adding a ‘After Body Tag’ Code to your Campaign pages