
IMPORTANT: KLEQ comes with a very powerful built in shopping cart and there is no need to use Thrive cart. We highly recommend you use our built in shopping cart to ensure you get the most out of our features. However if for some reason you need to keep using your thrive account this guide will help. Note we are not able to provide support for Thrive Cart, please contact them directly
If you are using ThriveCart, with Zapier, you can easily integrate with your website to register/cancel members when purchasing your products.
What you need to is the following:
1. Connect your ThriveCart account with your Zapier account.
2. In ThriveCart, go to Settings > Integrations and if you scroll down you will reach Zapier and you click on the button that says Get Started.

3. You will be redirected to your Zapier account and you will have the option to Create this Zap.

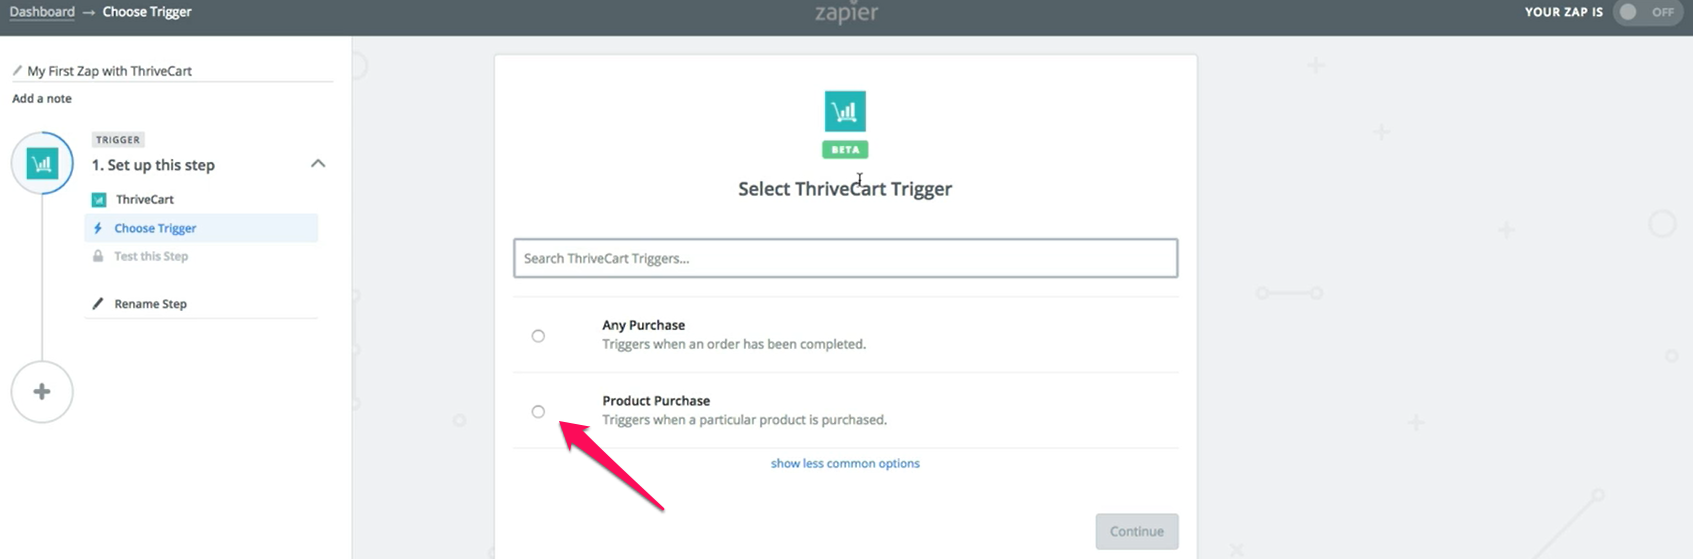
4. On the trigger section, if you are selling a product through ThriveCart, you will need to add Product Purchase and click on Save and Continue. Alternatively, you can choose to have your Zap trigger when a product purchase is refunded, in which case, you can choose the Product Refunded and select your desired product that you wish to refund.
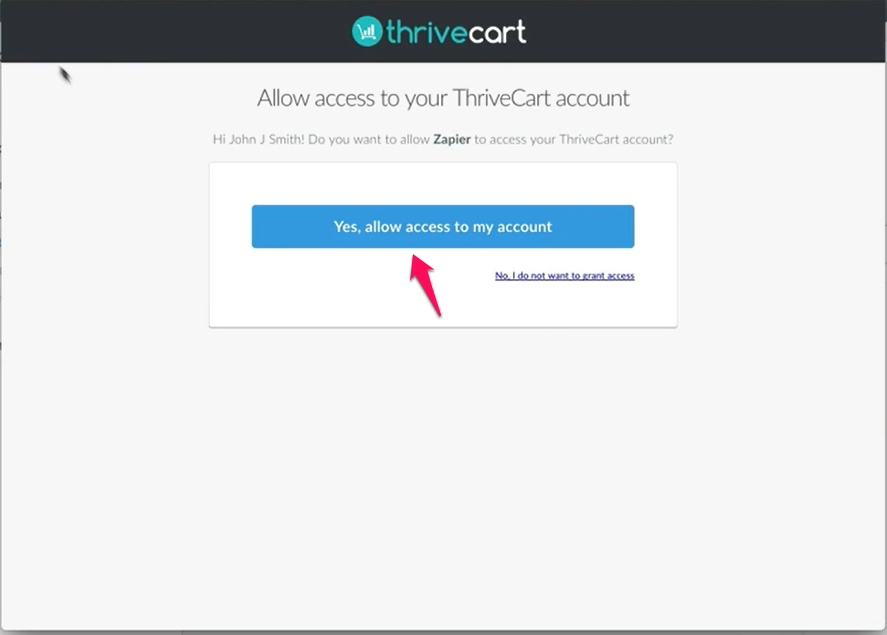
5. The next step will be to connect your ThriveCart account with Zapier. Simply click on Connect an Account, a pop-up will appear and since you are connected to your ThriveCart account in the other tab, you will simply need to click on the button that says Yes, allow access to my account and now, In Zapier, your newly connected account will show up. Click on Save and Continue to move to the next step.
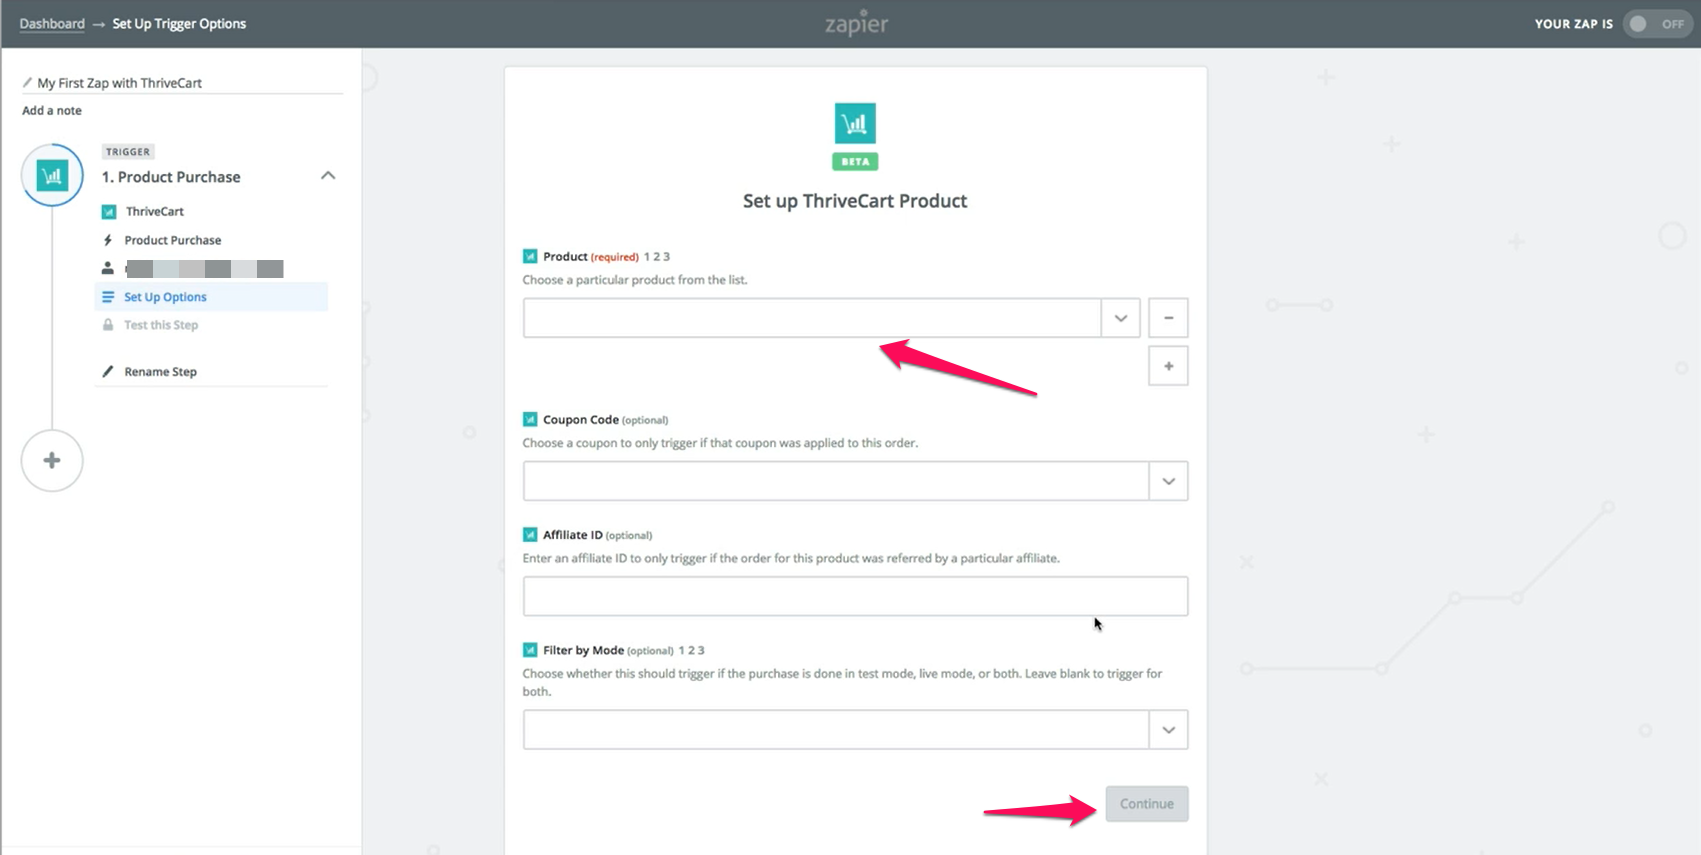
6. Next you will need to choose the product that, when purchased, will trigger your automation. From the drop-down under Product, select your desired product. You do not need to worry about Coupon Code, Affiliate ID or Filter by Mode.
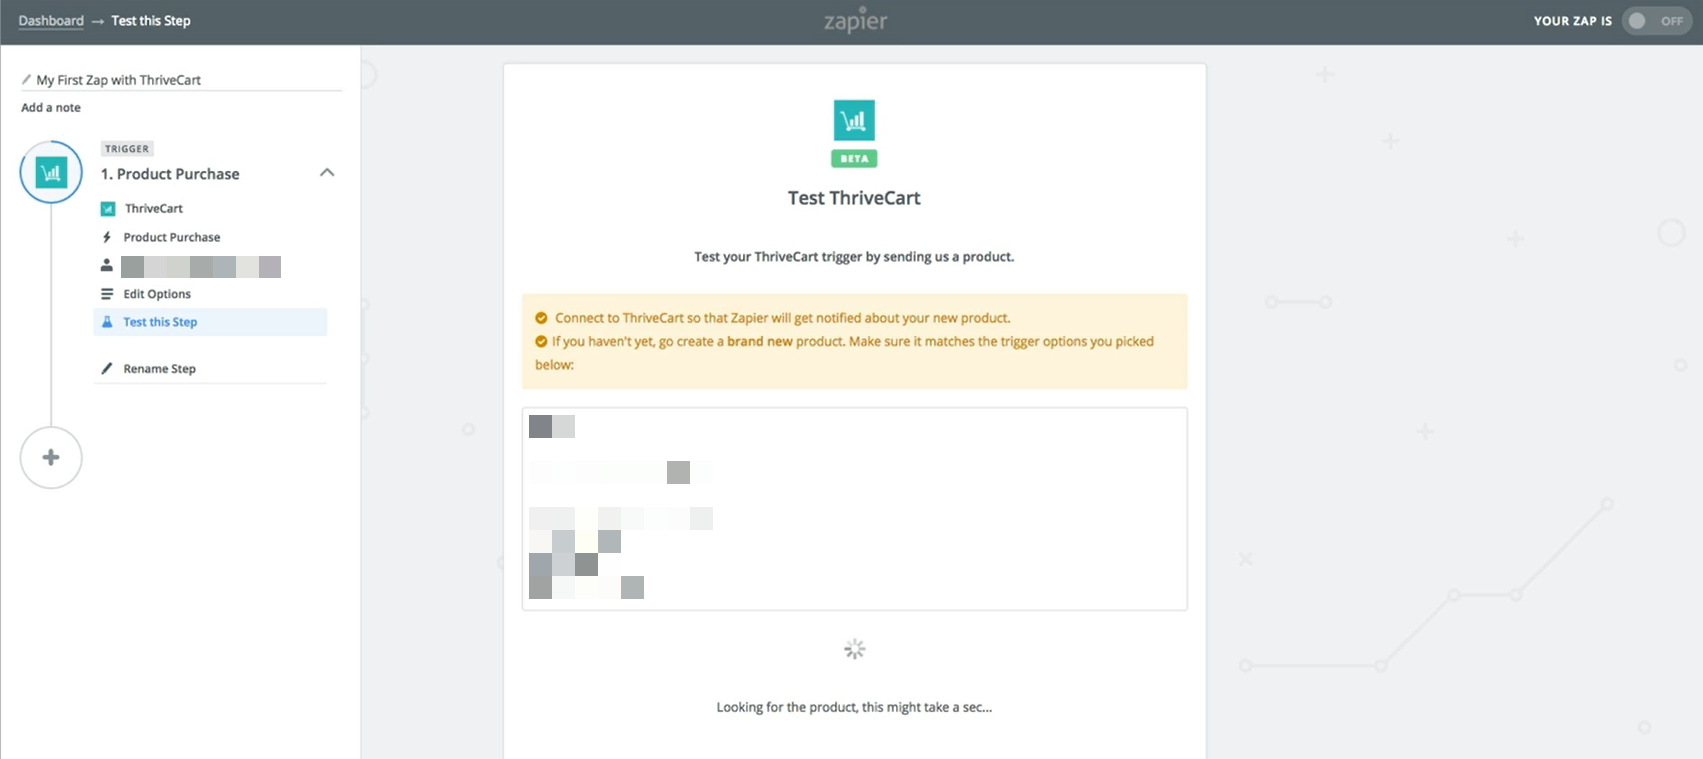
7. At this point we need our newly created ThriveCart trigger. When you click on Connect and Continue, Zapier is going to be waiting for a trigger to come through. What this means that we need to do a test transaction on your checkout in ThriveCart. In order to set up a test, you need to:
a. Go to your ThriveCart products dashboard, scroll down to the product you intend to use as a trigger in Zapier, and click on GET URL and click on View checkout page.

b. Enter your credentials such as Name and Email address and a test card number for your checkout (commonly used test card number is 4242424242424242).
c. When all your details are validated on ThriveCart, go back to Zapier and click on “Connect&Continue”. By doing this, you will tell Zapier to wait for a purchase made on your ThriveCart account.
 d. Go back to ThriveCart and click on Complete Order.
e. Now, in Zapier, you will get a message that will say Test Successful! and you will also see the customer information that was submitted in ThriveCart on checkout.
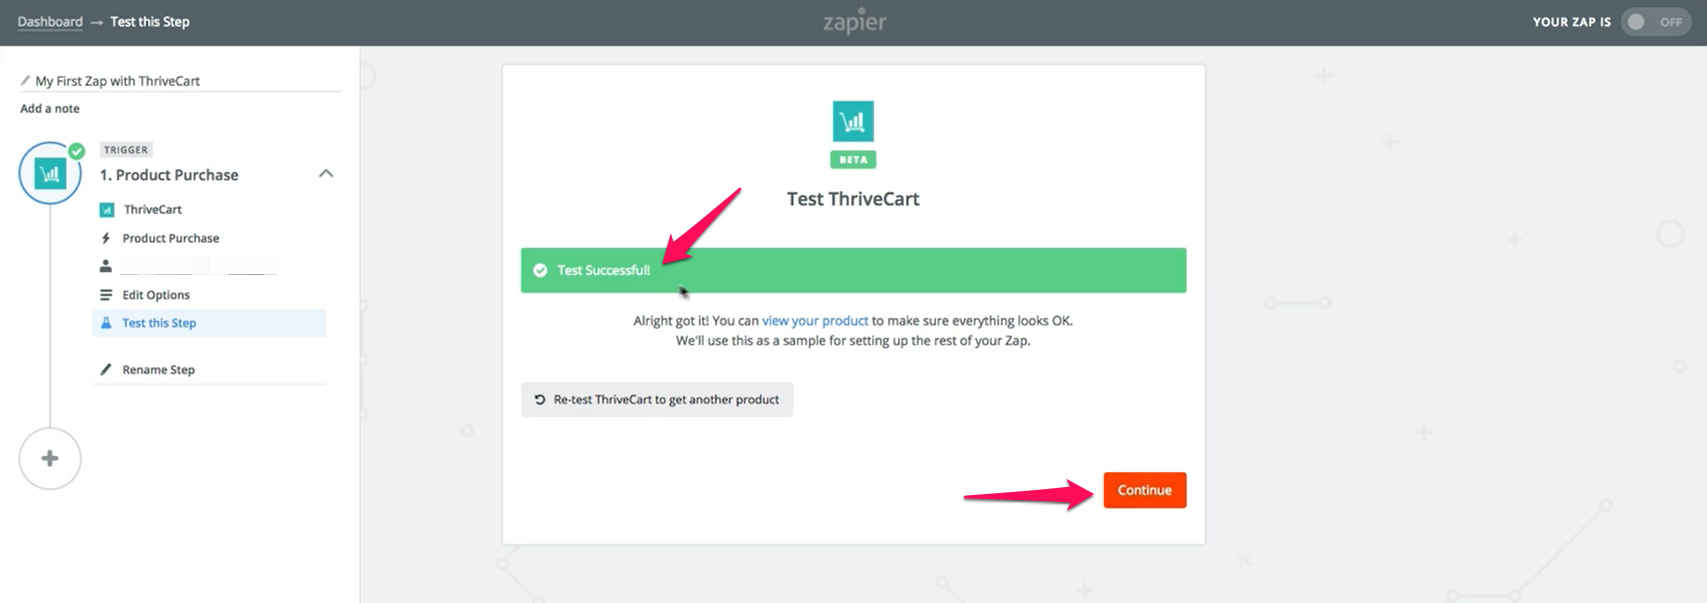
8. Click on the orange Continue button.
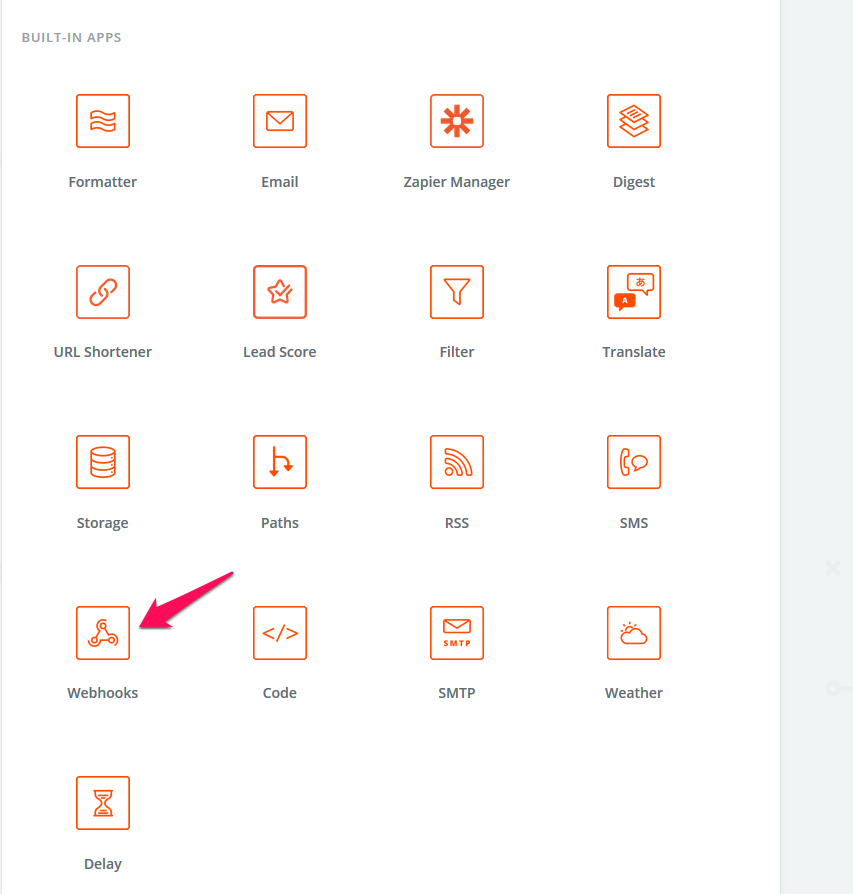
9. Next you will need to set up your Action Step and for this we will use a Webhook from the the Built-in Apps sections.
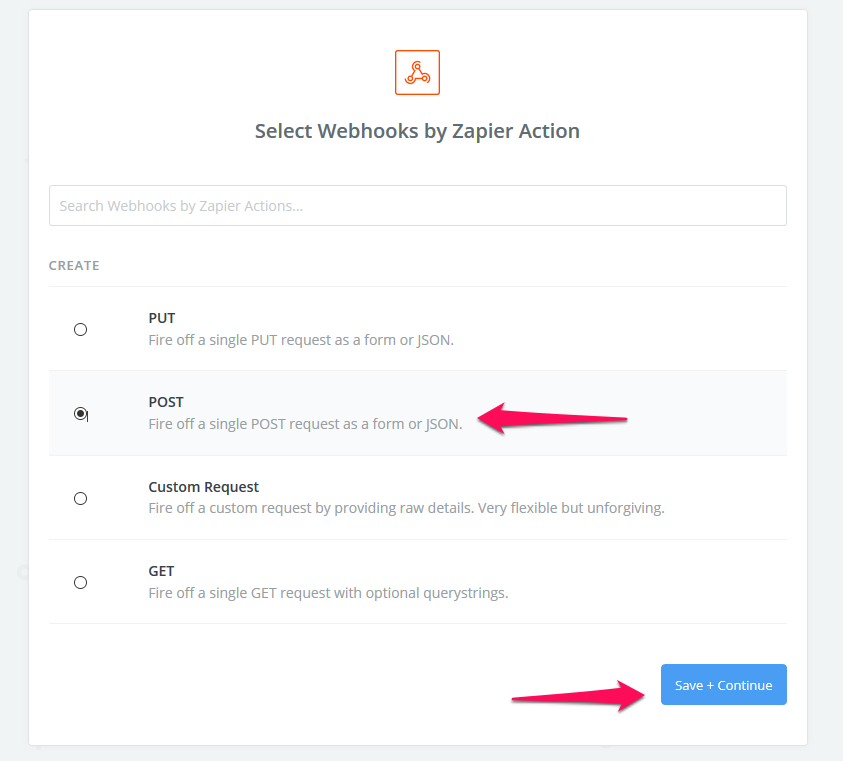
10. The type of webhook will be a POST webhook, as we want to send information, based on a purchase, to our KLEQ Website.
11. For the POST URL needed for the next step we will use the custom API provided by KLEQ. You can find this by going to Settings > Integrations and in the Custom API section. Here you will find the API URL needed to either Register someone to either a Course, Bundle or a Forum, or the API URL needed to Cancel their registration. 
12. Copy the URL and enter it in Zapier in the URL section. By doing this, every time the Zapier Action triggers from a purchase in ThriveCart, Zapier will call this API URL.
13. Next you need to set up what happens when the API URL is called. You do that by entering information in Zapier under Data. You can add information such as type, course_id / bundle_id, email, first_name, last_name and so on. Regarding the “email”, “first_name” and “last_name”, you can grab this from the data being sent from ThriveCart when the clients submit a purchase, so you can have them set to auto fill dynamically when posting your API.
 For example, if you are selling access to a course on ThriveCart and you have the following Course set up in your Online Courses area, you will need to add Registration API URL and the following parameters, along with the personal information of the client (email, firstname and lastname) to your POST URL in Zapier:

type => purchase
course_id => 6
However, if your initial Zap was set up for a refund of a purchase, you can use the Cancellation API URL in the POST URL in Zapier with the following parameters:
type => credit
course_id => 6
14. You will get a Sample as an example, that Zapier will send to your KLEQ system, containing all the details you set up beforehand. Once done, you will receive a notification Test Successful! to confirm everything is setup correctly.
By following these steps, every time a customer purchases your products from ThriveCart, you will be able to Register them to your KLEQ website.