This feature allows you to apply a specific action as users land on a certain page, so that you can implement advanced automation for that page e.g. Cart Abandonment follow-up emails. To do this, simply follow these basic steps.
Page Landing Action setup
- Go to Campaigns and then select the relevant Campaign and page you would like to edit (e.g. Order Page).

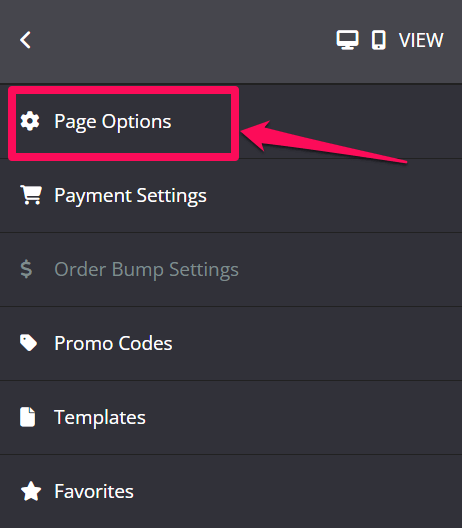
- Once opened, click on Page Options form in the left-sidebar menu.

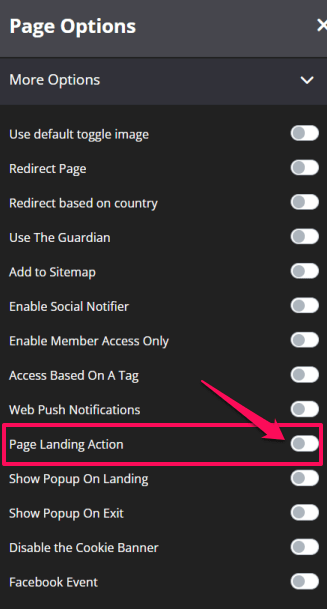
- Click on the More Options, switch on the Page Landing Action option.
 From the drop-down, select the Action you would like to occur when user lands on this page:
  Send details to web form
If you want to add the user to one of your email list, simply select Send details to web form then insert your web form code from your email system.Send to webhook
If your email system is not listed or you want to do something special, you can always select the Send to Webhook option. Simply use a service like Zapier.com and connect with your system of choice.Apply a Tag
If you want apply a specific tag to users who land on this page, simply select the Email System you are using (if supported) and the relevant tag you would like to add. - Once done, click on SAVE.
- At the bottom of this setting you will find a field called Use this URL:
- Copy the URL that appears in that field e.g. https://yourdomainname.com/dwefm3ue?contactEmail=XXX and paste it in to a plain text document.
- Replace the XXX with an Email merge field supported by your Email System.
- Once done, you will use this special link to redirect your users to this page.
That’s it! Now when users land on your page via the special link, the system grabs the user’s email from the Contact Email parameter included in the page URL. Depending on the Action selected in the Page Landing Action settings, the user’s data will then be sent to either a webform, a webhook or will be added to your email system with the chosen tag applied.
