
Google Analytics is very important for you to track activity on your website, such as getting information on how many people view your pages, how many people purchase from your website, etc.
- Sign in on Google Analytics. If you don’t have an account yet, you can create one here. For more information about Google Analytics, please click here.
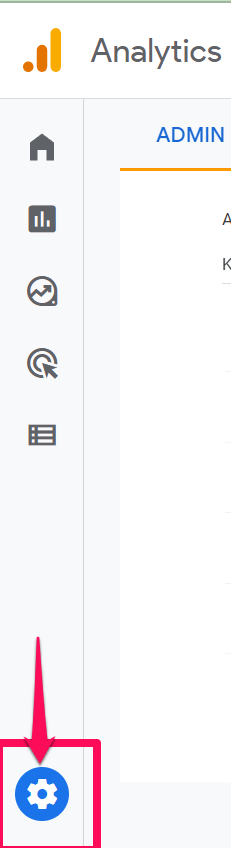
- Go to Admin (gear icon) in the left sidebar menu.
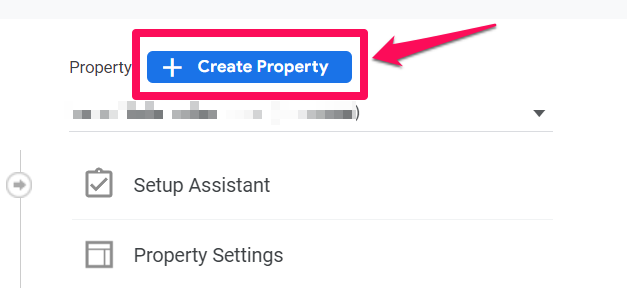
- Click on Create Property.
- Enter a name for the property (e.g. “My Business, Inc website”)

- Select the reporting time zone.

- Select the currency.

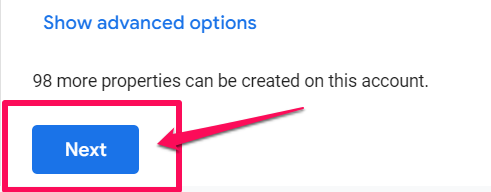
- Click Next. Select your industry category and business size.
- Click Create and accept the Analytics Terms of Service and the Data Processing Amendment.

Add a Data Stream
- In Admin, look at the Account column to make sure that you have your desired account selected. Then, look at the Property column to make sure that you have your desired property selected. In the Property column, click Data Streams.

- Click Add Stream and select Web.

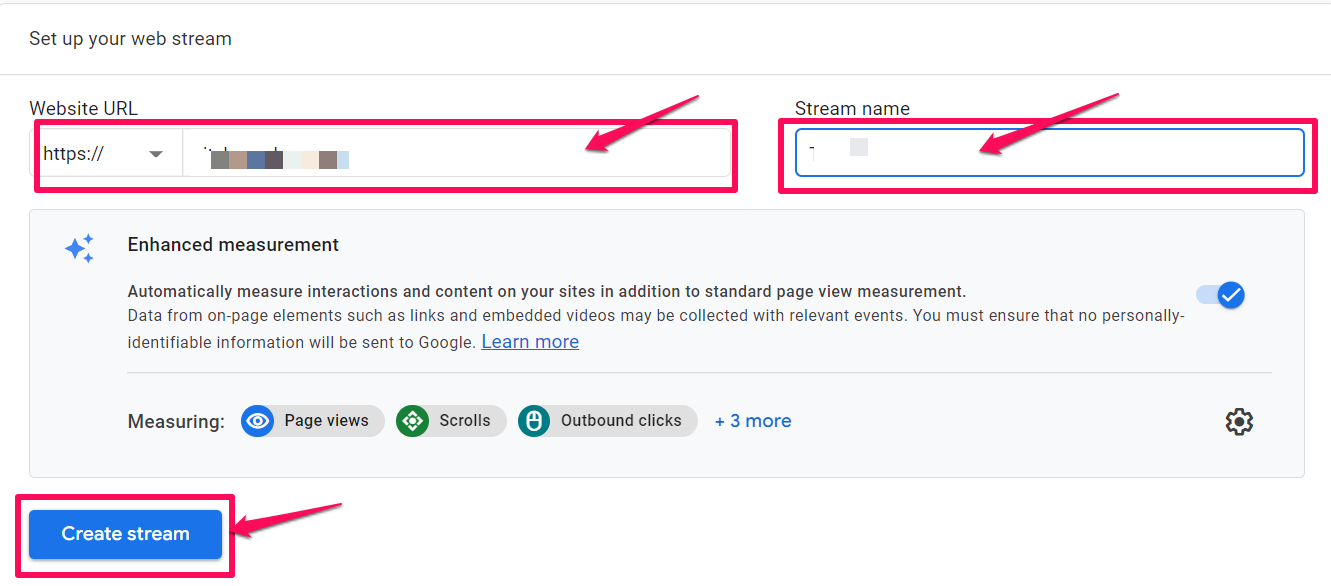
- Enter the URL of your primary website, e.g., “example.com”, and a Stream name, e.g. “Example, Inc. (web stream)” and click Create Stream.
- Once the Date Stream is created, click the data stream for your website.

- Click View tag instructions.

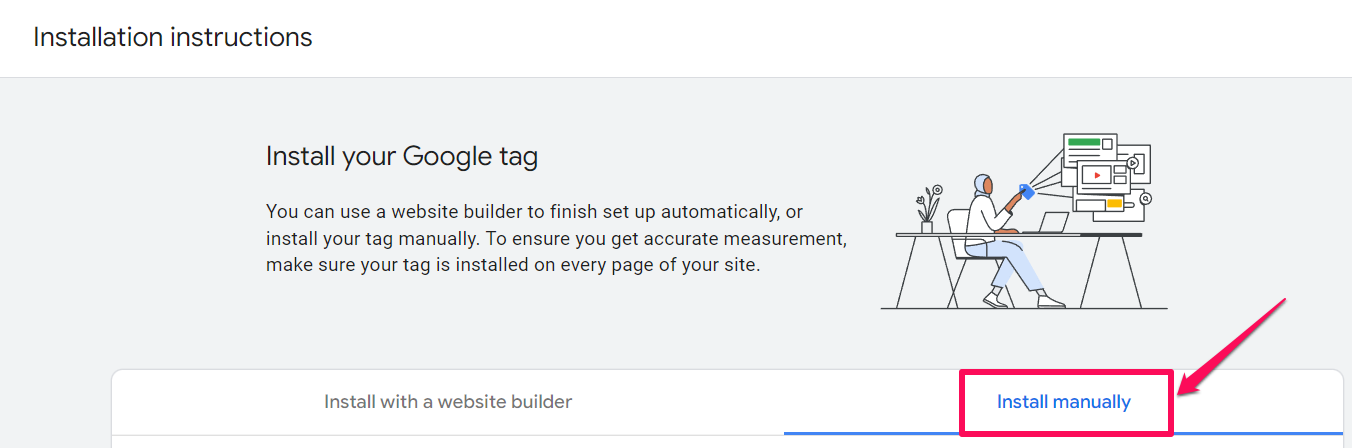
- On the Installation instructions page, select Install Manually.
- On the screen, you’ll see the JavaScript snippet for your account’s Google tag. Your Google tag is the entire section of code.

- You can now add your tracking code to your KLEQ website.
Adding Google Analytics to your KLEQ site
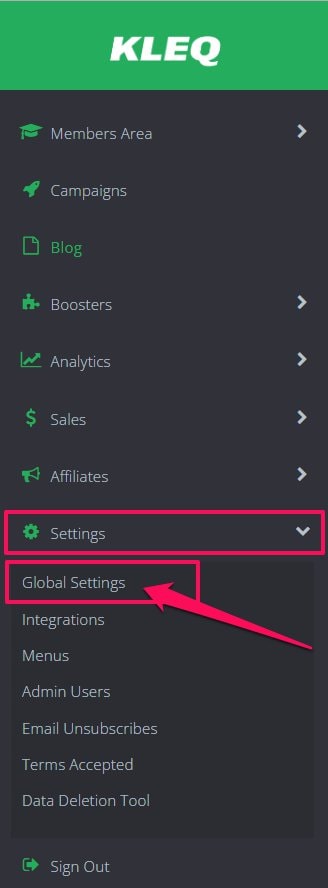
- Go to Settings in the left-sidebar menu and then select Global Settings.
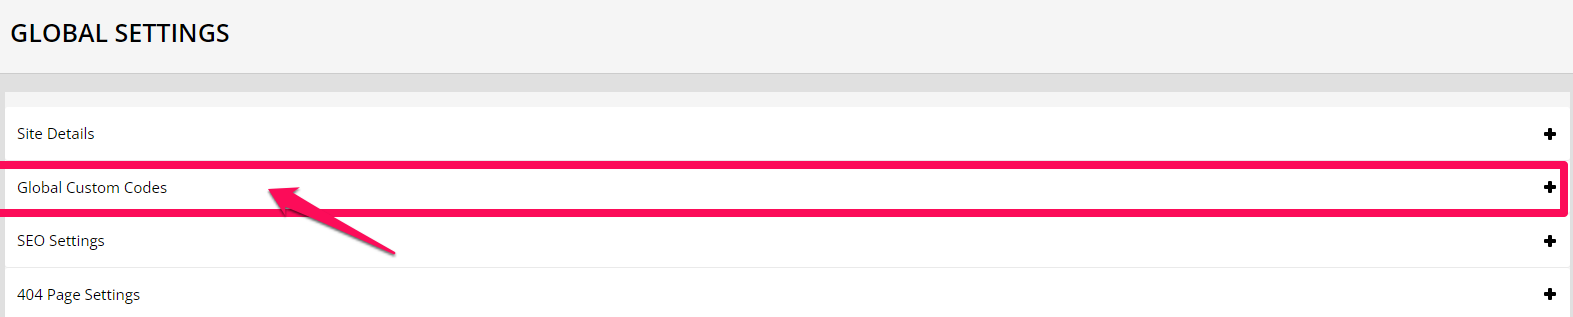
- Go to Global Custom Codes.
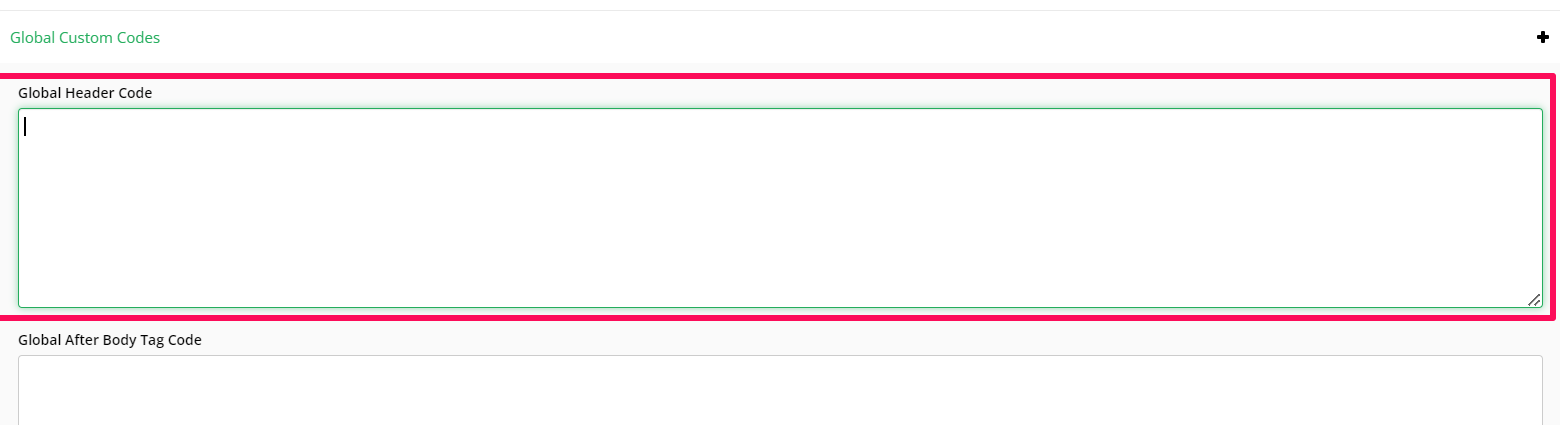
- Take the tracking code that you got from Google when setting up the site analytics and paste the code in Global Header Code field.
- Click on SAVE CHANGES and you’re done.
Related Articles
12011 – Adding Custom Header code
02024 – Adding a Header Code to your Course pages