
You can now add an Audio Block to your Campaign or Course page. This element allows your users or visitors to play audio directly from your page.
To do this:
- Go to your relevant Campaign or Course.
- Select the page where you want to add the Audio block.
- In the right Preview Pane, mouse over the Row (green border) where you want to add a new Block element. Then mouse over any existing Block (black border) in the Row, and click on the black Plus (+) icon at the bottom of the Block. This will open the Blocks element list in the left sidebar menu.

- Select Audio in the right side panel options.

- A new Audio block will appear in the Preview Pane of your page on the right and the Block Settings will appear in the left-sidebar menu.
Settings Overview

Details
- Audio URL
Add your audio URL here. Any self-hosted MP3 can be use (e.g. Amazon S3 ).
You may only use the audio URL and not the link to the page.IMPORTANT: An example of a valid audio URL is https://s3-ap-southeast-1.amazonaws.com/media.one/record-10-14-2018_1-05-09.mp3. As you may see from the above link, it ends with the “.mp3” file type. An audio URL is a link to the actual audio file from your self-hosting site. - Audio Title
Add the title of the audio, and it will display on your Audio block - Audio Author
Add the author of the audio, and it will display on your Audio block - Image
You can add any audio image here, such as an album cover.
When uploading an image, the original file name will be kept and a prefix will be added. This will help from an SEO perspective.
For example:
If you will upload an image called John.jpg, the image will be stored as 1234-John.jpg (1234 is the timestamp)
If you will upload an image with special characters on the filename, the image will be stored as %XX (XX are numbers e.g. # to %23) - Show Playback Speed
Enable change playback speed in the player, 1x by default.
Speed multiplier: 0.5x, 1x, 1.5x, 2x
Audio Events
This feature will allow you to track how much of the audio they’re listening and apply different tags. 
- Under the Action drop down, select one of the following options.
NB! Options will depend on your account’s current available integration.
None
This options is selected by default, if enabled no action will happen during the audio replay.
Send Webhook
If selected, you will be able to send user data to any platform you want using a Webhook URL.
Apply Infusionsoft Tag
If selected, you will be able to add an Infusionsoft Tag to the contact’s profile.
Apply Active Campaign Tag
If selected, you will be able to add an Active Campaign Tag to the contact’s profile.
Apply ConvertKit Tag
If selected, you will be able to add an Active Campaign Tag to the contact’s profile.
Apply MailChimp Tag
If selected, you will be able to add a MailChimp Tag to the contact’s profile.
Apply Ontraport Tag
If selected, you will be able to add an Ontraport Tag to the contacts profile.
Add to Flodesk Segment
If selected, you will be able to add a Flodesk Segment to the contacts profile.
Add to MailerLite Group
If selected, you will be able to add a MailerLite Group to the contacts profile.
- Once you have selected the relevant action above, click on the Add Item button.
- This will open the Action #1 fields for you to edit:
 + Time in Seconds – This field allows you to choose when a tag or action should occur during the playback of the audio. Simply add the time in seconds.+ Tag drop-down – Depending on what action was selected in the Action field, the relevant Tag drop-down will be visible in the Action #1 section e.g. if you choose Apply Infusionsoft Tag, then the Infusionsoft tag drop down will be visible here.
 - Use this link to access page – If you’re doing this on your public page and you want to add a tag on your email system, please ensure that when they land on the page, the system must know their email address. To do this, you will use this special link to redirect your users to this page.
Important: Replace the XXX with the Contacts Email merge field supported by your Email System.
- You can add as many Action Items as you want to your audio. To add more Item fields, simply click on the Add Item button
- Once done, simply click on SAVE.
Font
By default Font is set to white. You can choose from the color picker what will be the font color displayed for Audio Title and Audio Author. 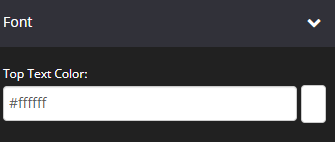
Background
You can select from the color picker the color that will appear on the background of the audio block. By default it is set to black. 
Width
- From the drop-down, select the preferred width % you would like for your Lesson block.
The higher the % selected, the less margin will be added on either side of the block.
Box Shadow
This feature allows you to add a shadow around the border of your Audio Block.

- Horizontal Shadow Position
Adjust the horizontal position of the shadow. Use negative integer value to adjust horizontal position to left. Or use positive integer value to adjust to right. - Vertical Shadow Position
Adjust the vertical position of the shadow. Use negative integer value to adjust vertical position to top. Or use positive integer value to adjust to bottom. - Blur radius
Adjust the blur radius. This will determine how blurry the shadow will be. Use positive integer value. - Spread radius
Adjust the spread radius. This will determine how large the shadow will be. Use integer value. - Shadow Color
To use custom colors, simply paste the Hex code of the exact color you want in field provided e.g. #000000 = black, or click on the Color Picker button to the right of the field.
This will open the Color Wheel, where you can select whichever color you prefer. - Shadow Color Opacity
Adjust the opacity or transparency of the shadow. Click on the slider and move it left or right to increase or decrease the opacity. - Shadow Position
Adjust the position of the shadow, either inside or outside (default) the button.
Alignment
This feature allows you to reposition the Audio block. 
- Block Align
You can choose either Left, Center or Right alignment from the drop-down
Spacing
Adjust the spacing of the Audio Block. 
- Margin Bottom
This feature allows you to add more space below the Audio block
Simply add the numeric (pixel) value to the field provided.
Options
This feature allows you to use the available options for extra coding (HTML/CSS/JavaScript) 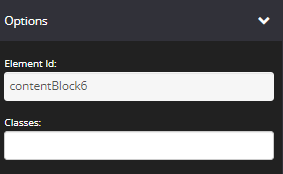
- Element Id:
This shows the element id of the Audio block, which can then be used by CSS and JavaScript to perform certain tasks for the element with the specific id value. To learn more, please check here
- Classes:
This feature allows is used to define equal styles for elements with the same class name. To learn more, please check here
Drip
This feature allows you to select the number of days customers must wait before accessing this audio. This option is only available on course pages.

- Type of drip
Automated: Based on registration date – This will deliver the content on autopilot and members will be able to access the page depending on their course registration date.
Scheduled: Deliver on a specific date – You can choose a specific date when the audio will be accessible. - Number of days / Time: Depending on the type of drip that you will select, for Automated, you have to specify the number of days based on the registration date when they can access the audio. While for Scheduled, simply select the date, time, and timezone.
Note: The Timezone that is set in Global settings will be applied.
Animation
This tool allows you to add animation effects to your Audio Block. 
- Type
From this drop-down, you can choose a trigger to activate the animation i.e.
+ None – no animation will be applied
+ On Page Load – the animation is triggered as the page loads
+ On Page Scroll – the animation is triggered only when the user scrolls to that section. - Style
This feature adds an animation style to your Audio Block. Simply choose the preferred option from the drop-down menu.
+ Fade In – the Audio Block will fade in from the background
+ Scale In – the Audio Block scales in from the background
+ Top – the Audio Block will slide in from the top
+ Right – the Audio Block will slide in from the right
+ Bottom – the Audio Block will slide in from the bottom
+ Left – the Audio Block will slide in from the left - Delay (ms)
If you want to add a time delay for when the bullet list appears, simply add the delay in milliseconds e.g. 3000ms will be 3 second delay.
Display
This feature allows you to choose the type of device support you want for the Audio block. 
- Display
From this drop-down, you can choose which device preference you want for the Audio block.
+ All Devices – the Audio block will be displayed on both desktop and mobile devices
+ Desktop Only – the Audio block will be displayed on desktop only
+ Mobile Only – the Audio block will be displayed on mobile devices only
+ None – the Audio block will not be displayed on both desktop and mobile devices
That’s it, click on SAVE and you are done!