To setup a Live Webinar, simply follow these steps:
Setting up your Live Webinar Page
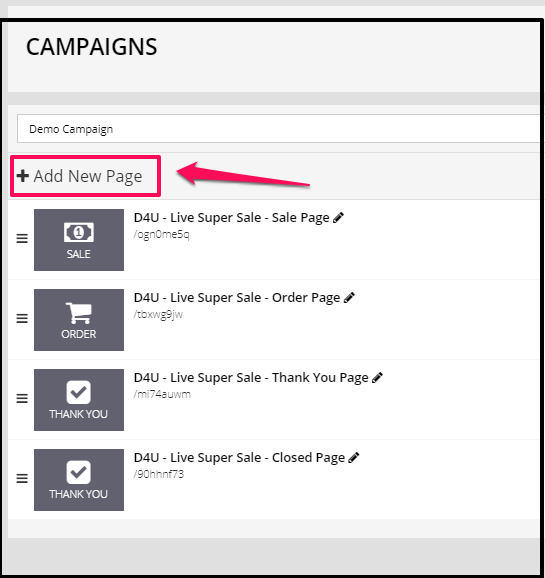
- Go to Campaigns in the left-sidebar menu.
From the Campaigns drop-down, select the relevant Campaign you want to add the Live Webinar to.
- In the next screen, click on the + Add New Page button.
- In the fields that appear, add a name for your event.
From the Select Page Template drop-down menu and then choose Webinar Pages.
In the next screen, click on Live Event Page.
The Live Event settings section will now open. - In the left-sidebar menu, you will find all the event settings for your webinar.

- In the right Preview Pane, all visible elements are customizable.
To edit these elements, simply click on the element in the Preview Pane and the settings for that element will appear in the left-sidebar menu.
Setting up your Live Event
- Click Video, and you have 3 options: YouTube, Twitch or Embed Code.

YouTube
If you select YouTube, you need to create a Live Event on your YouTube channel. We use the OBS software since the Google on air hangout has been discontinued.
For more info on how to setup a Live Event using YouTube. Please watch the video tutorials on KLEQ Academy and look for “Streaming like a Boss”
Once done, copy the Video ID for your live event and paste it in the YouTube Video ID field in the left-sidebar menu.
Twitch
If you select Twitch video type, insert the Stream ID (the name of your channel). 
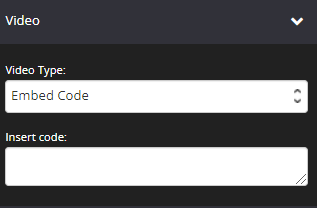
Embed Code
If you want to use Facebook Live, Twitch, Vimeo streams or even Zoom instead of YouTube, select Embed Code.
Create a live event on your site, then, get the Embed Code.
Paste the code on the Insert Code field.
Once you added your video, click on SAVE button.
- You can also add Starting Soon & The Event is Over custom images, which will display when Not Started, Closed and Replay options are selected in the Event Status section.
The image dimensions are 710 x 400px (JPG or PNG format) - Go to Event Settings in left-sidebar menu and then click on the Images.
- Upload the relevant images under the Not Started Yet Image and Close Image sections.

Tracking Event Status Action
You can track who attends the live Event, who sees your Buy button or who stayed to the end of the Event, by enabling the Event Status Action feature in the Event Settings section. This can be done using a Webhook URL or by applying tags (Infusionsoft, Active Campaign, AWeber, ConvertKit, Drip, or Ontraport).
Apply a Tag
If you choose to apply a Tag, your email system tag drop-down will appear under the following fields: 
+ Event Starts Tag
+ Button Appears Tag
+ Event Ends Tag
- Simply select the relevant tag for each field
If you need to create a new tag, scroll down to the bottom of the drop-down and click on Create New Tag. Once done, select the tag. - Click on SAVE.
Send Webhook
If you choose Webhook, a webhook URL field will appear under the following fields: 
+ Event Starts Webhook
+ Button Appears Webhook
+ Event Ends Webhook
- Simply add the relevant Webhook URL you’ve setup for each field
- Click on SAVE.
Controlling your Live Event
- When you are ready to go live, go to Event Settings in left-sidebar menu.
Under Event Status click on the drop-down menu and select Live.

That’s it, your event page will immediately update with the live stream.
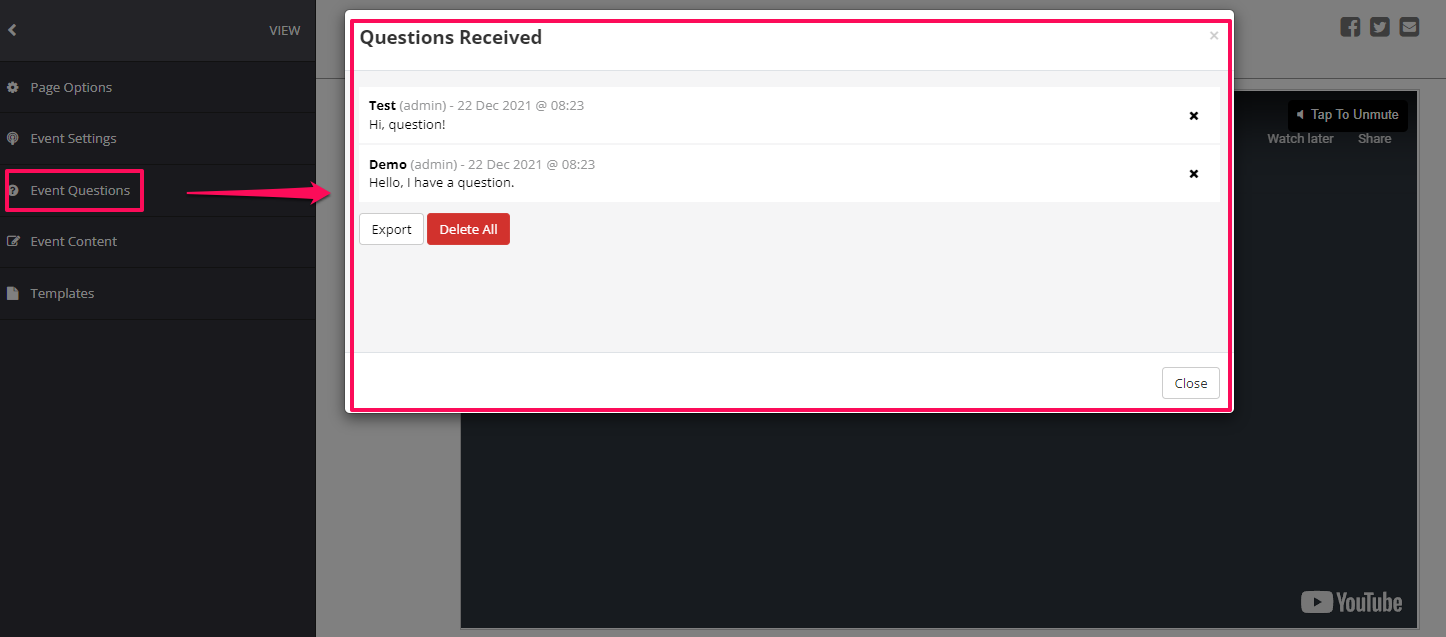
Managing Questions during a Live Event
- Back in the Live Event settings dashboard, go to Event Questions in the left-sidebar menu.
- In the pop-up window that appears, you will see the list of questions posted by your customers. This window is live and will automatically update with new questions as they are posted by customers.
- You can also control when customers are able to submit questions. Simply go to Event Settings in left-sidebar menu and then click Controls. Switch the toggle on/off on one of the following preferred options:

Webinar Name
It will be the name or title of your Live webinar. 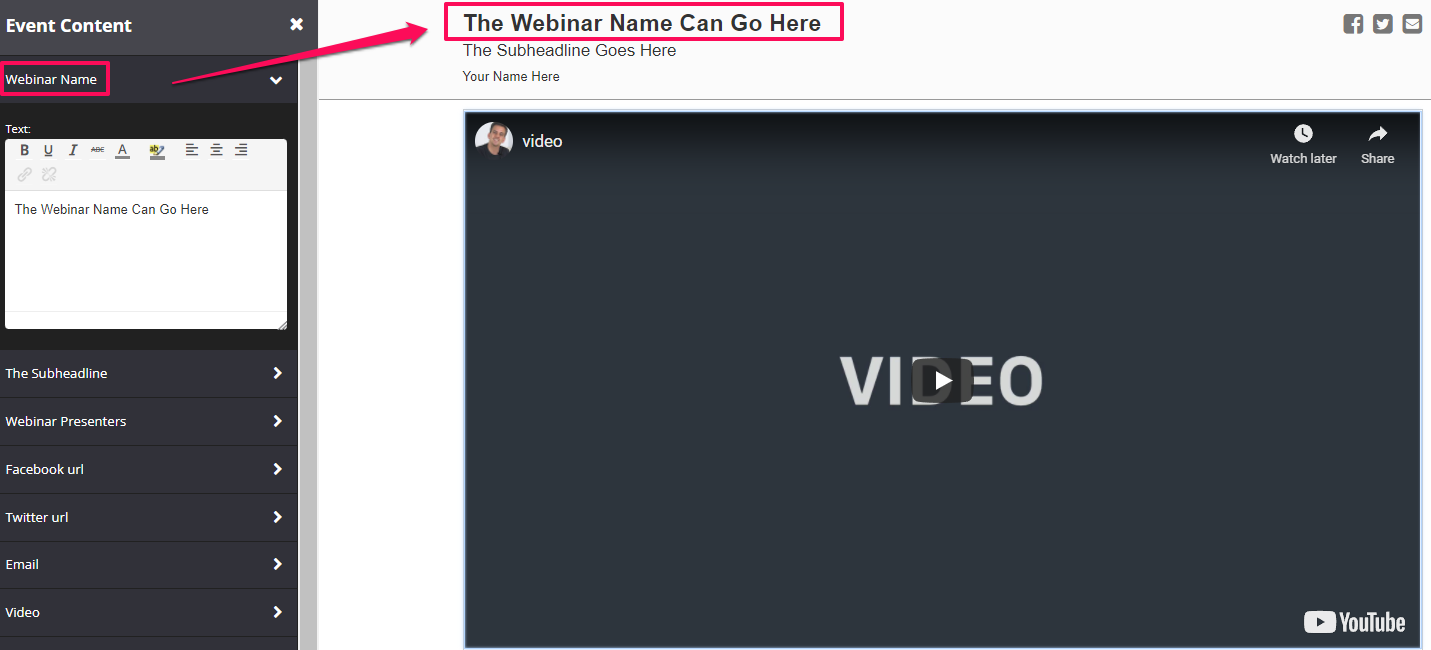
The Subheadline
This feature will allow you to put more text or subheadline under your Webinar name. You may also hide it, simply switch the toggle on Hide Item. 
Webinar Presenters
Your name or the name of the presenter will be displayed here. 
Facebook URL, Twitter URL and Email
These are the social media icons on the upper right side corner of your webinar. If you want to allow your viewer to share your Live webinar. Simply select the page that will be shared when they click the icon. You may also hide them. 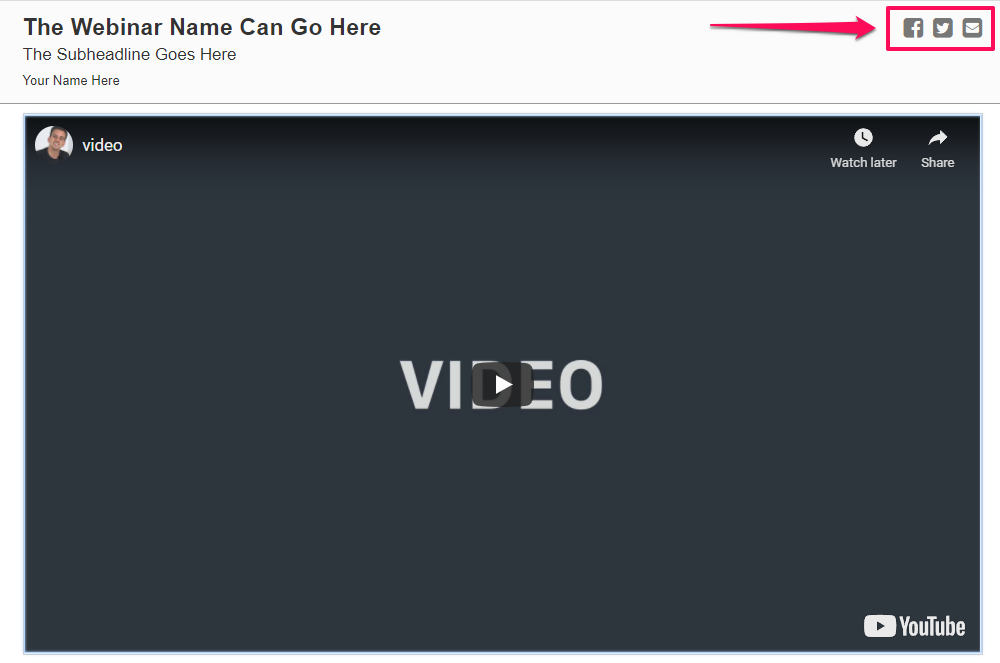
Display “Call To Action” button during Live Event
If you would like to promote a Special during a live webinar, this is a great feature.
You will be able to set up two buttons from which to choose during the Live event. 

To activate this feature
- Click on the Action Button 1 or 2 in the left-sidebar menu.
- Add your custom text & Background color for the Action Button
- Add the URL of the special you are running.
- If you need to pass certain parameters included in the URL of your Webinar Page to the next page (e.g. Sales page), enable the option Pass URL parameters to next URL.
- Click on SAVE.
Now you are ready to run this promotion during your Live Event
To do this:
- Click on Event Settings in the left-sidebar menu.
Under Controls, switch the toggle on Show Call to Action Button option.
You may choose which button to show.
The Button will be enabled in your page.
Once done, click on SAVE.

The Call to Action button will immediately appear on your Live Event page
JavaScript/HTML
If you want to have your own custom code, it will appear right above the question box. 
Managing Questions during a Live Event
- Back in the Live Event settings dashboard > Go to Event Questions in the left-sidebar menu
- In the pop-up window that appears, you will see the list of questions posted by your customers. This window is live and will automatically update with new questions as they are posted by customers.
- You can also control when customers are able to submit questions. Simply go to Event Settings in left-sidebar menu and tick one of the following preferred options: Enable Question When Not started, Enable Question When Live, Enable Questions When Closed, Enable Questions When Replay
- Upon clicking Event Questions, you will see all Questions Received.
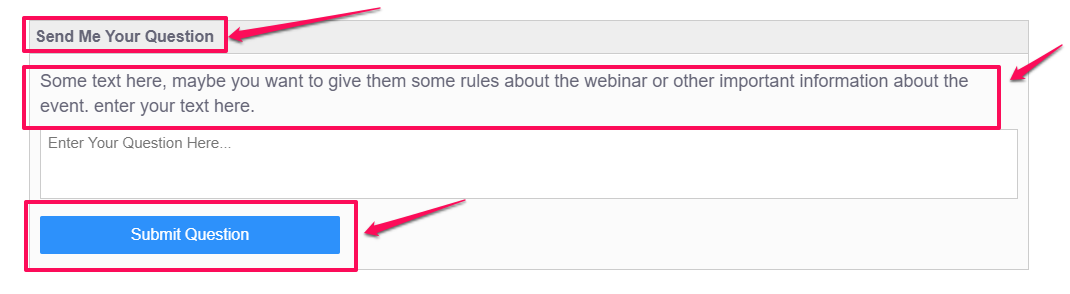
Question Box Title, Question Box Text and Question Submit Button

Your viewer will be able to see whatever you have set up for your Question Box.
-
- Question Box Title – change the title for your question box.
- Question Box Text – change the text inside of your question box.
- Question Submit Button – change the text color and background color of your question submit button.