
The Facebook Comments Block allows you to add a Facebook Comments section anywhere in your Campaign page.
Below is an overview of the various Facebook Comments settings:

Details
- Facebook Comment URL
NB! In the field provided, add the page URL from your KLEQ site that you would like FB Comments to use.
The Facebook Comments Block will work with any link added to this field, but the moderation feature will only activate if you use a link that contains the root domain used in the setup of your Facebook app.
For more details about how Facebook Comments plugin works, click here.
- Number of Comments
Select the number of comments you would like to have visible on your page. - Color Theme
Select the color theme you prefer for your Facebook Comments section.
TIP!
Use the Light theme when the background color of a page is light
Use the Dark theme when the background color of your page is dark. - Sort By
Select what filter you would prefer to sort the order of the Facebook comments, as they appear on your page. The sorting options are Social, Time and Reverse Time.
+ Social:- sorts the comments so that the most relevant comments from friends and friends of friends are shown first, as well as the most-liked or active discussion threads. Comments marked as spam are hidden from view.
+ Time:- sorts the comments in order of newest to oldest
+ Reverse Time:- sorts the comments in order of oldest to newest
Spacing
- Margin Bottom
This feature allows you to add more space below the Facebook Comments Block
Simply add the numeric (pixel) value to the field provided.

Options
This feature allows you to use the available options for extra coding (HTML/CSS/JavaScript)
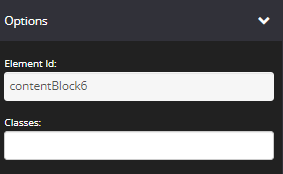
- Element Id:
This shows the element id of a specific block, which can then be used by CSS and JavaScript to perform certain tasks for the element with the specific id value. To learn more, please check here
- Classes:
This feature allows is used to define equal styles for elements with the same class name. To learn more, please check here
Animation
This tool allows you to add animation effects to your Auto Deadline Countdown Timer.

- Type
From this drop-down you can choose a trigger to activate the animation i.e.
+ None – no animation will be applied
+ On Page Load – the animation is triggered as the page loads
+ On Page Scroll – the animation is triggered only when the user scrolls to that section. - Style
This feature adds an animation style to your Auto Deadline Timer. Simply choose the preferred option from the drop-down menu.
+ Fade In – the Timer will fade in from the background
+ Scale In – the Timer scales in from the background
+ Top – the Timer will slide in from the top
+ Right – the Timer will slide in from the right
+ Bottom – the Timer will slide in from the bottom
+ Left – the Timer will slide in from the left - Delay (ms)
If you want to add a time delay for when the Auto Deadline Timer appears, simply add the delay in milliseconds e.g. 3000ms will be 3 second delay.
Display
This feature allows you to choose the type of device you want the Facebook Comments block to display.

- Display
From this drop-down, you can choose which device you want to display the Facebook Comments block
+ All Devices – the Facebook Comments block will be displayed on both desktop and mobile devices
+ Desktop Only – the Facebook Comments block will be displayed on desktop devices only
+ Mobile Only – the Facebook Comments block will be displayed on mobile devices only
+ None – the Facebook Comments block will not be displayed on both desktop and mobile devices
That’s it, click on SAVE and you are done!