The Link provides a faster and more flexible way to build your course content. Unlike traditional pages, links don’t require editing in the page builder. When a user clicks the link in the navigation, they are taken directly to the specified destination. This is useful for external URLs and for opening specific pages within the course.
To Get Started:
- Navigate to Members Area > Online Courses in the left sidebar menu.

- Then, click the Content button for the online course where you want to add the link.
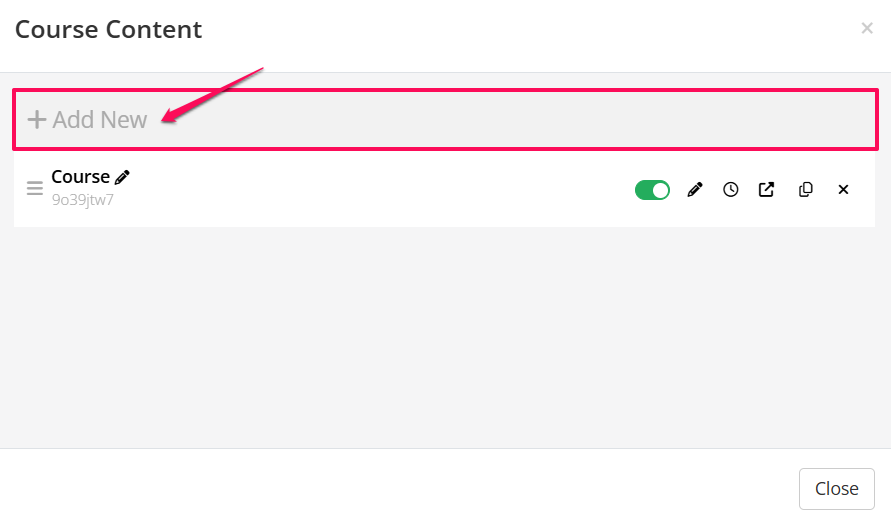
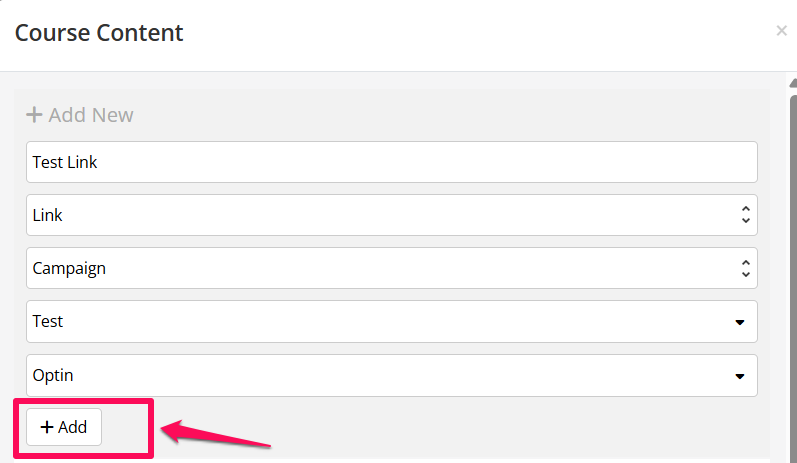
- The Course Content pop-up will open. Click +Add New to add course content.
- In the course content settings, enter a name for the link. In the second dropdown menu, select Link. In the last dropdown menu, select the destination for the link.
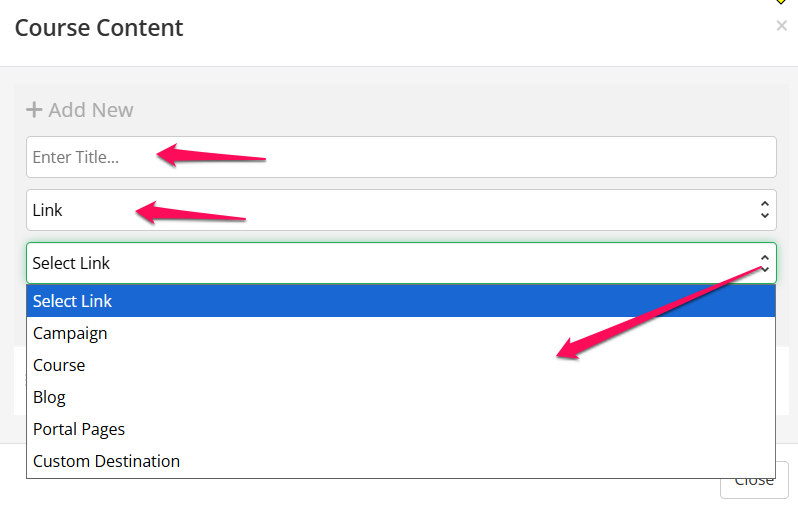
Choose a destination link from the following:
+ Campaign
Select a campaign name, then select the specific campaign page in the next dropdown.
+ Course
Select a course name, then select the specific course page in the next dropdown.
+ Blog
Select the desired blog page.
+ Portal Pages
Select the desired portal page.
+ Custom Destination
Enter the full URL of the desired page.
- Once done, click +Add.
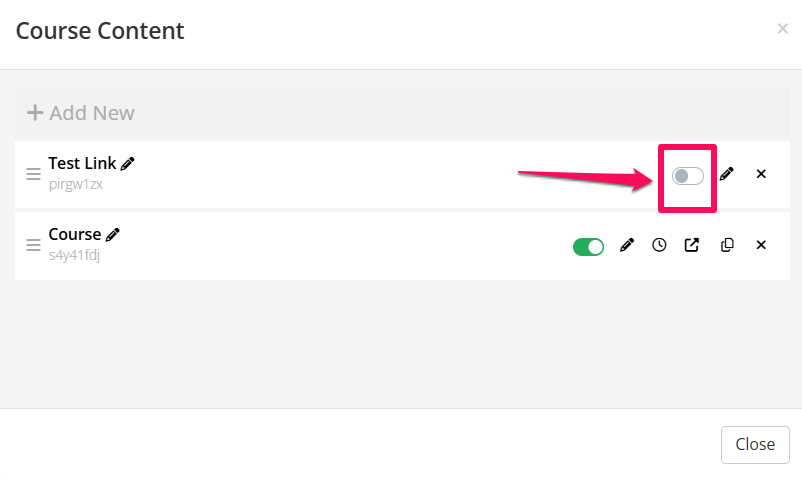
- A new Link appears in the Course Content table.
NB! The Publish toggle is OFF by default.
Be sure to set this toggle to ON when you’re ready to publish the link. If the Publish toggle is OFF, the link will not appear in the navigation bar.
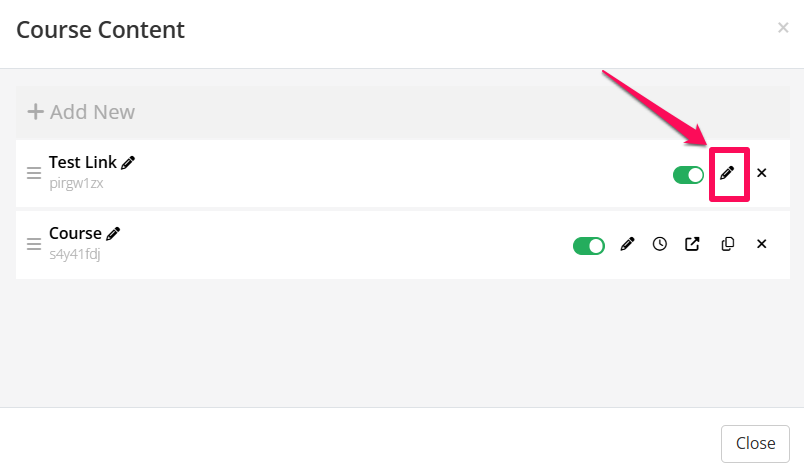
- To edit the link, click the Edit button.
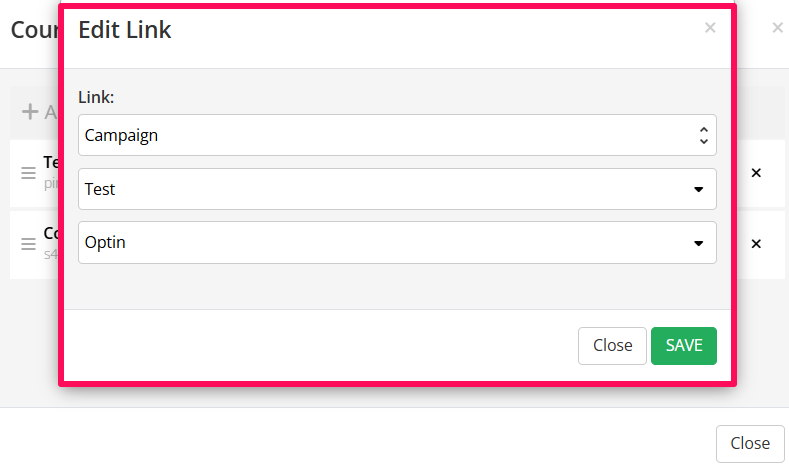
- An option to edit the link will appear on the screen. Choose the link you want from the dropdown menu, then click the Save button.
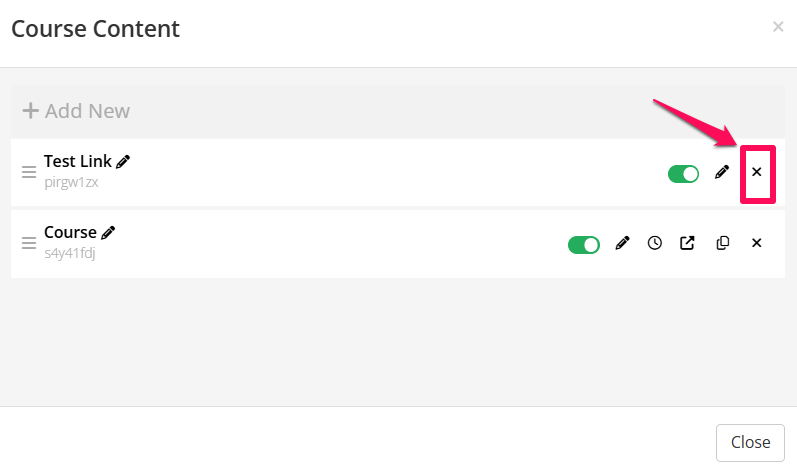
- To delete the link, click the Delete button.